Learn how to make an adjustable bracelet knot using this video tutorial and step-by-step instructions. This knot is perfect for finishing any string bracelet and is easy to master.
Adjustable Bracelet Knot
This adjustable bracelet knot is the perfect way to tie a bracelet slip knot. Use it on any bracelet you make. This tutorial will give you instructions and tips for figuring out this technique.
Friendship bracelets are a fun and inexpensive craft for older kids to create.
In order to truly master this art, there are some important knots to learn.
We already covered the 5 basic knots that you will find in a lot of string bracelets. This is a sliding knot bracelet, which is perfect for ending your projects.
Need a bracelet idea before you learn this tutorial? Try one of our friendship bracelets:
- Candy Stripe Bracelet
- Flower Bracelet (coming soon!)
- Twisted Bracelet
You can use string bracelets in several ways.
- Give them to your best friends.
- Use them as colorful gift wrap ribbons.
- Pass them out as handmade Valentines.
- Make them at a sleepover.
- Create them during long car rides.
Disclosure: Some of the links in this post are “affiliate links.” This means if you click on the link and purchase an item, we may receive an affiliate commission.
No time to make this sliding knot bracelet? Pin it for later!
If you’re currently in planning mode, that’s ok! Pin this to your favorite Pinterest board. That way you’ll be able to grab instructions when you’re ready!
Tips for making a slip knot bracelet
- This knot requires a crochet hook. If you do not have one, you can use a paper clip! Simply unfold your paper clip completely and then create a small hook at one end.
- The biggest tip for this knot is to make sure you have plenty of extra string before and after your bracelet design. It makes things much easier to have plenty of slack.
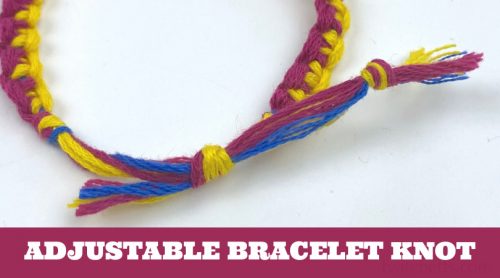
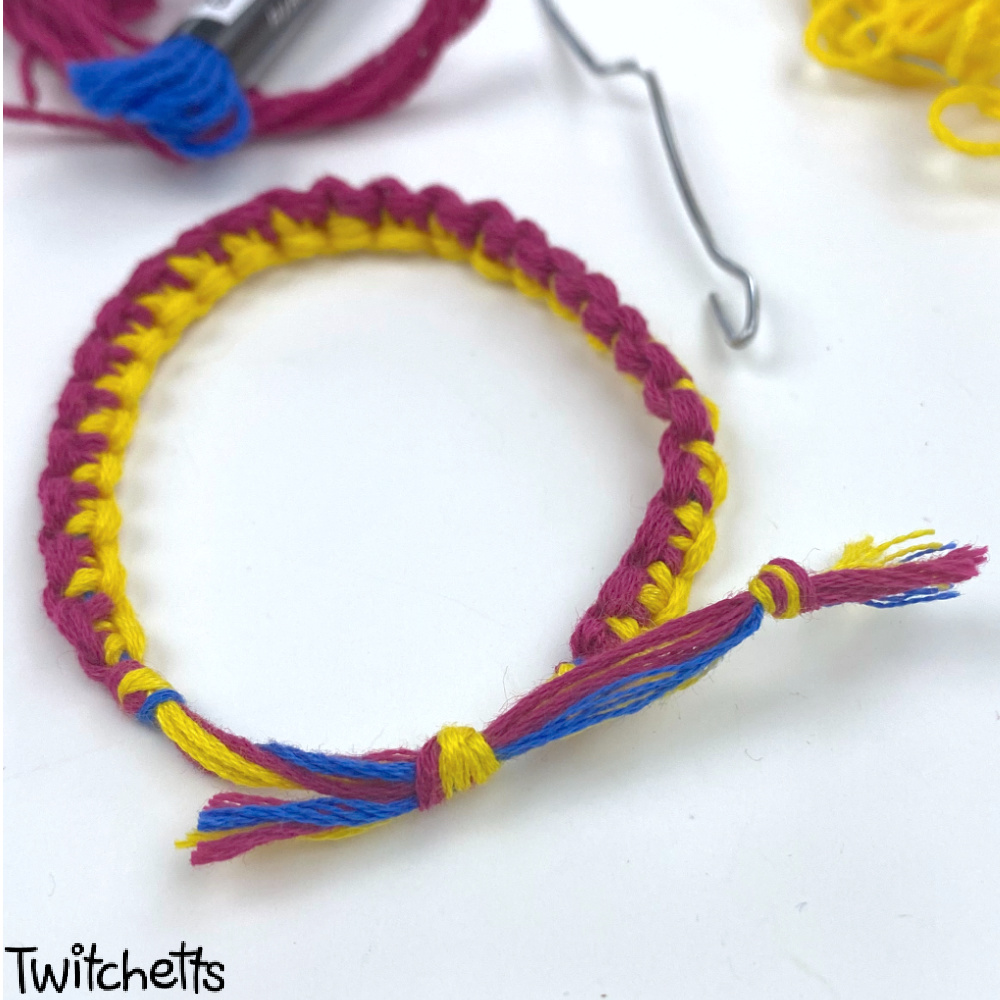
Sliding knot bracelet instruction

Using this sliding knot you can secure a bracelet in a way that you can take it on and off again! This adjustable bracelet knot is the perfect way to end any friendship bracelet.
Materials
- Finished Friendship Bracelet - Your bracelet will need to have extra string at either end.
Tools
- Crochet Hook or Create a Hook with a Bent Paperclip
- Scissors
Instructions
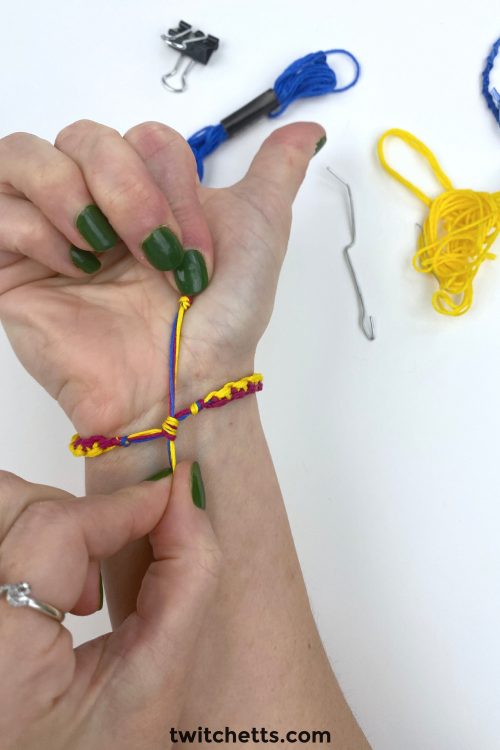
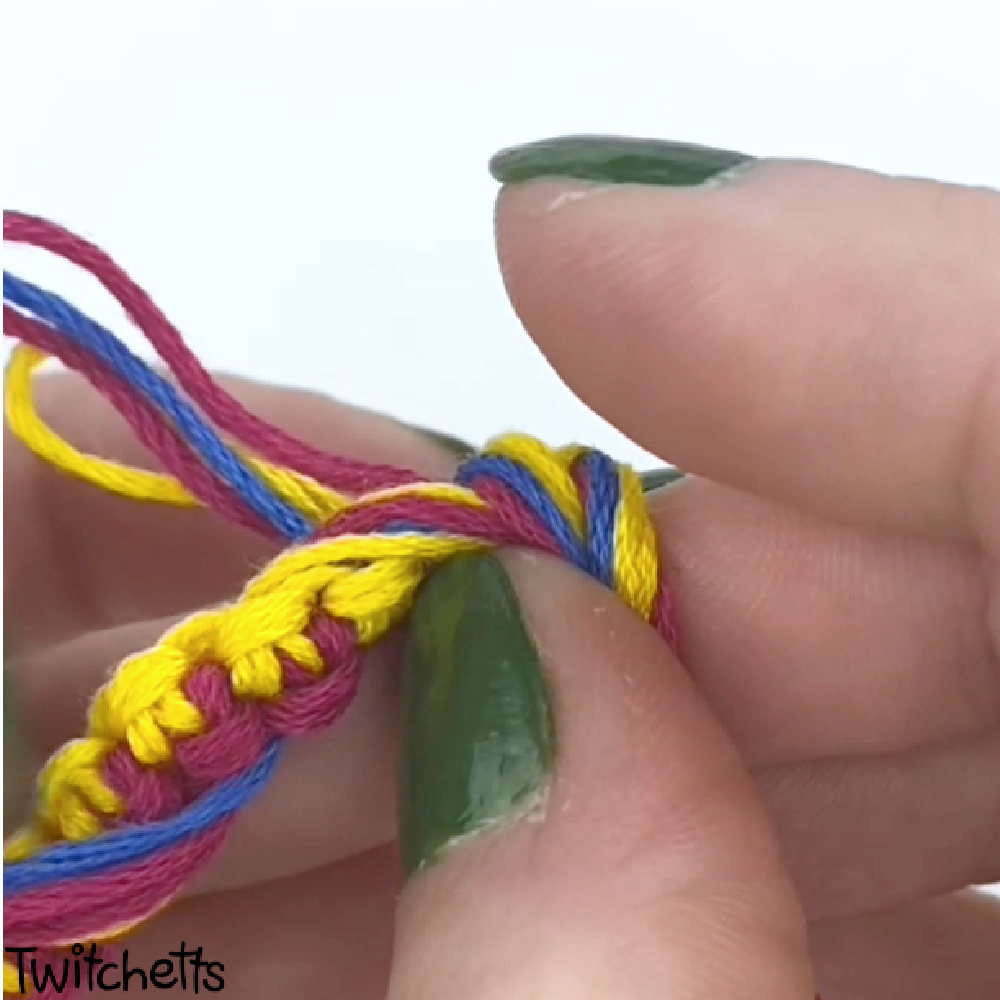
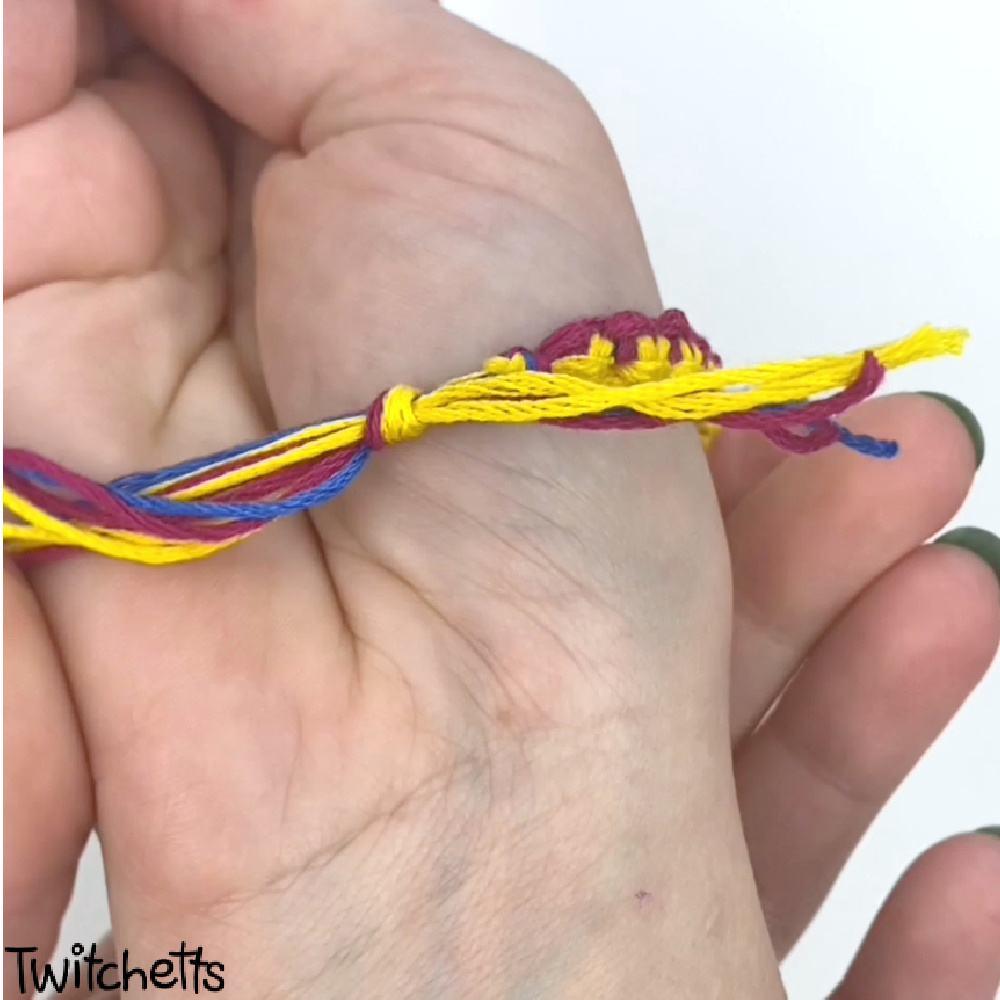
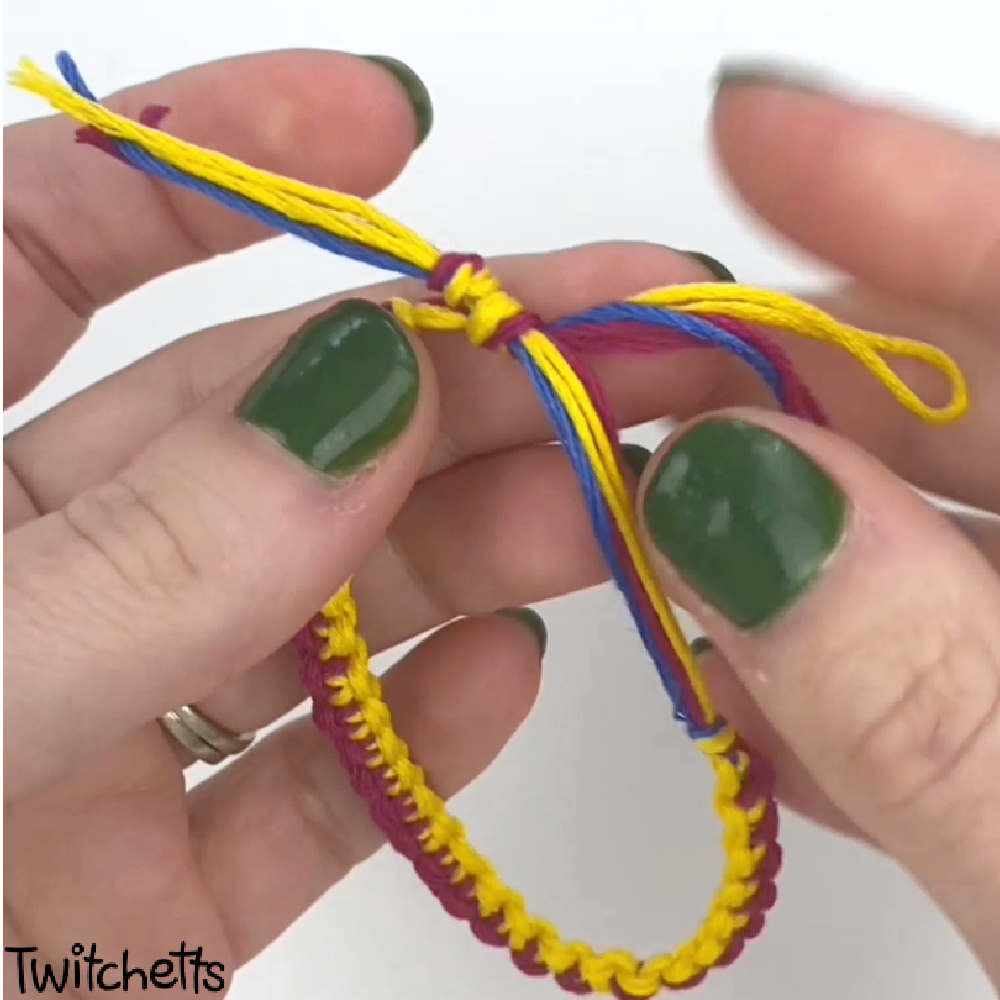
- Start by creating a bracelet shape with the back strings going off to the right. The front strings go off to the left. Make sure to leave enough space between the end knots for the final slip knot to land.

- Take the strings hanging to the left of the bracelet and loop them a few times around the bracelet to help hold the shape, and keep them out of the way.
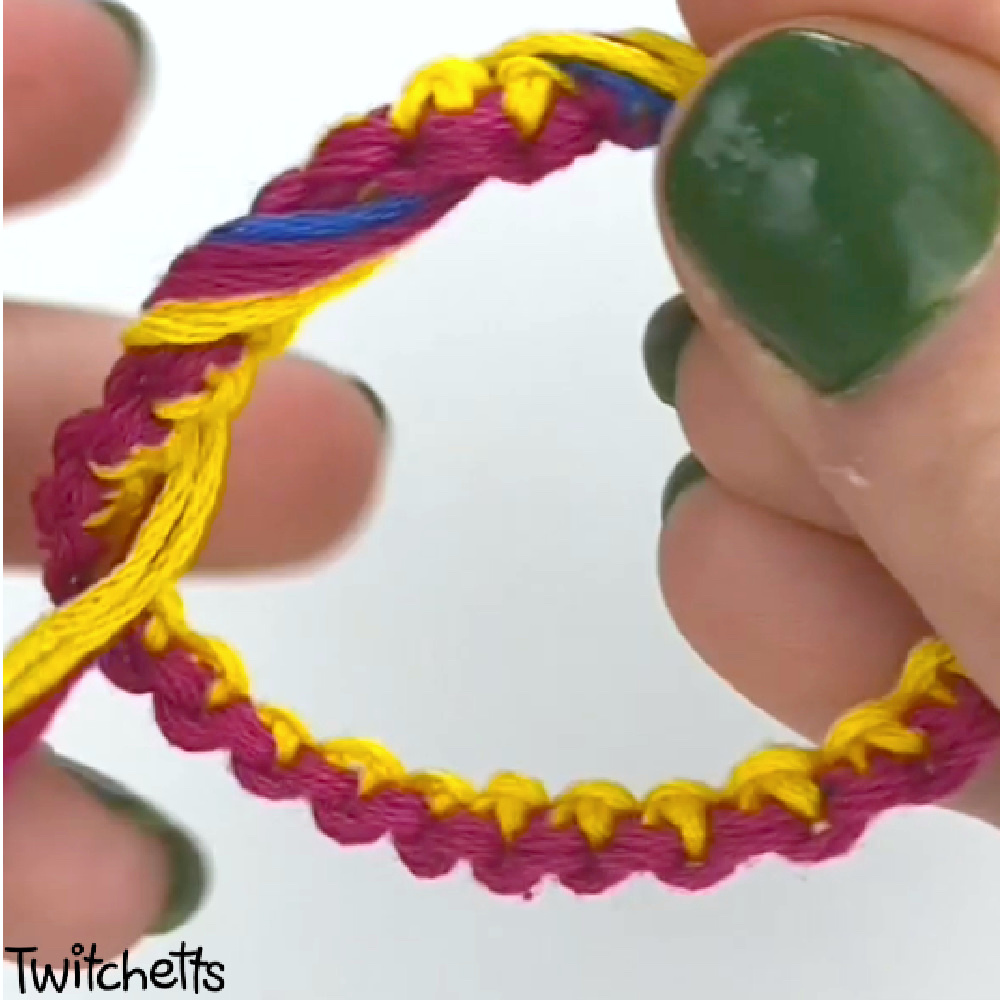
- With your left hand, hold the bracelet secure. With your right hand, lift the back bracelet end.

- Wrap that end down through the bracelet hole and out the back.
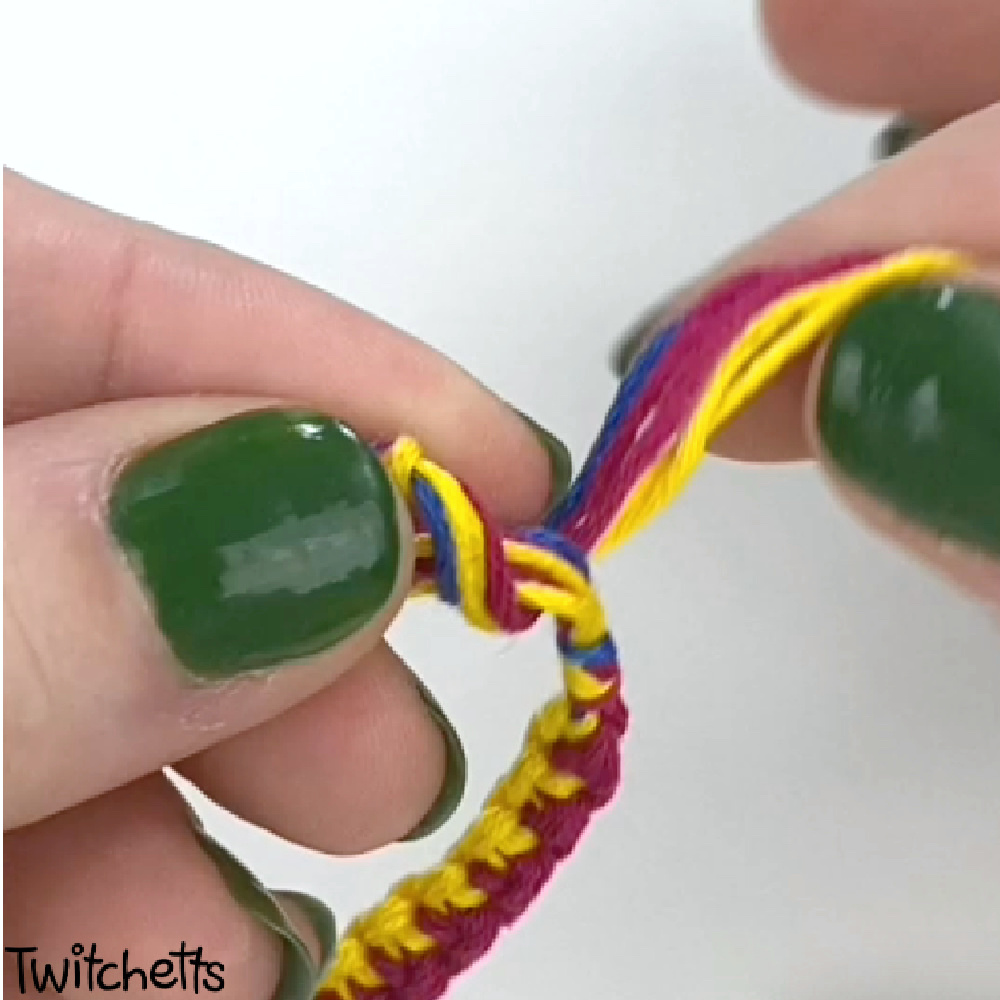
- Make sure you do not pull this loop tight.
- Next, Take the end and go down through the bracelet hole again. You want this second loop off to the left-hand side of the first one.
- Again, loosen the loops.
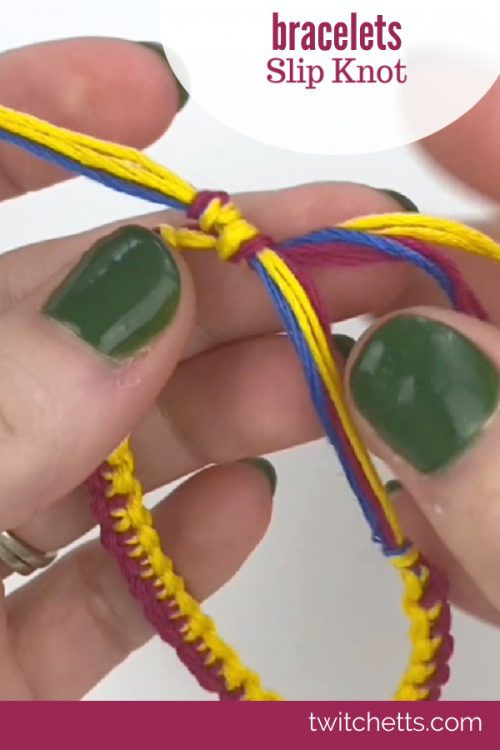
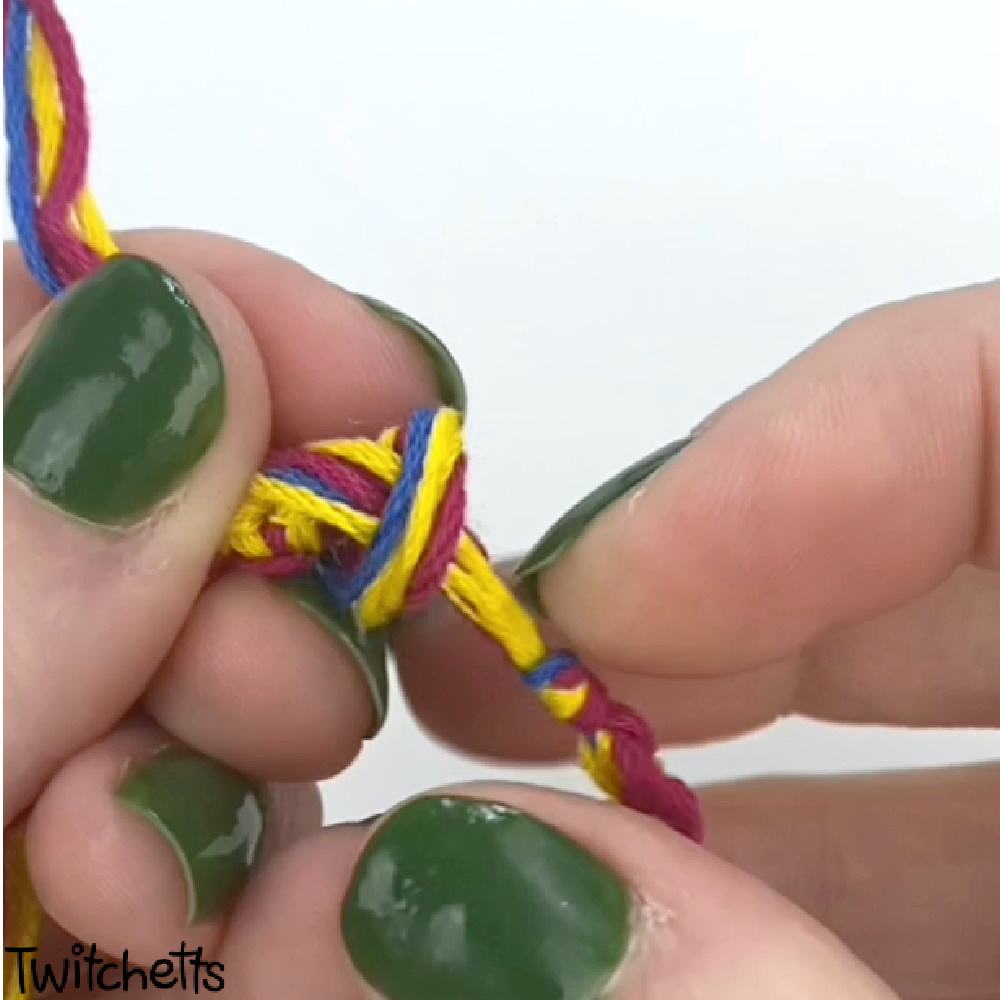
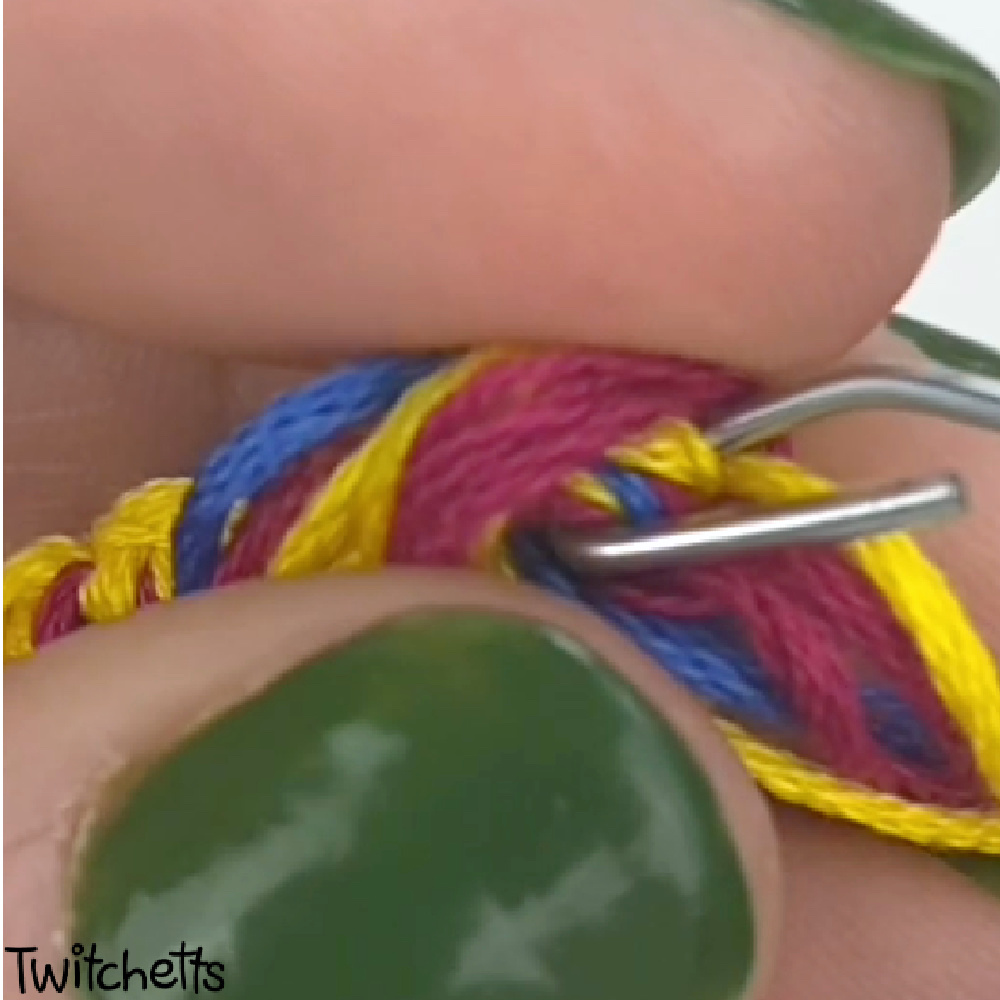
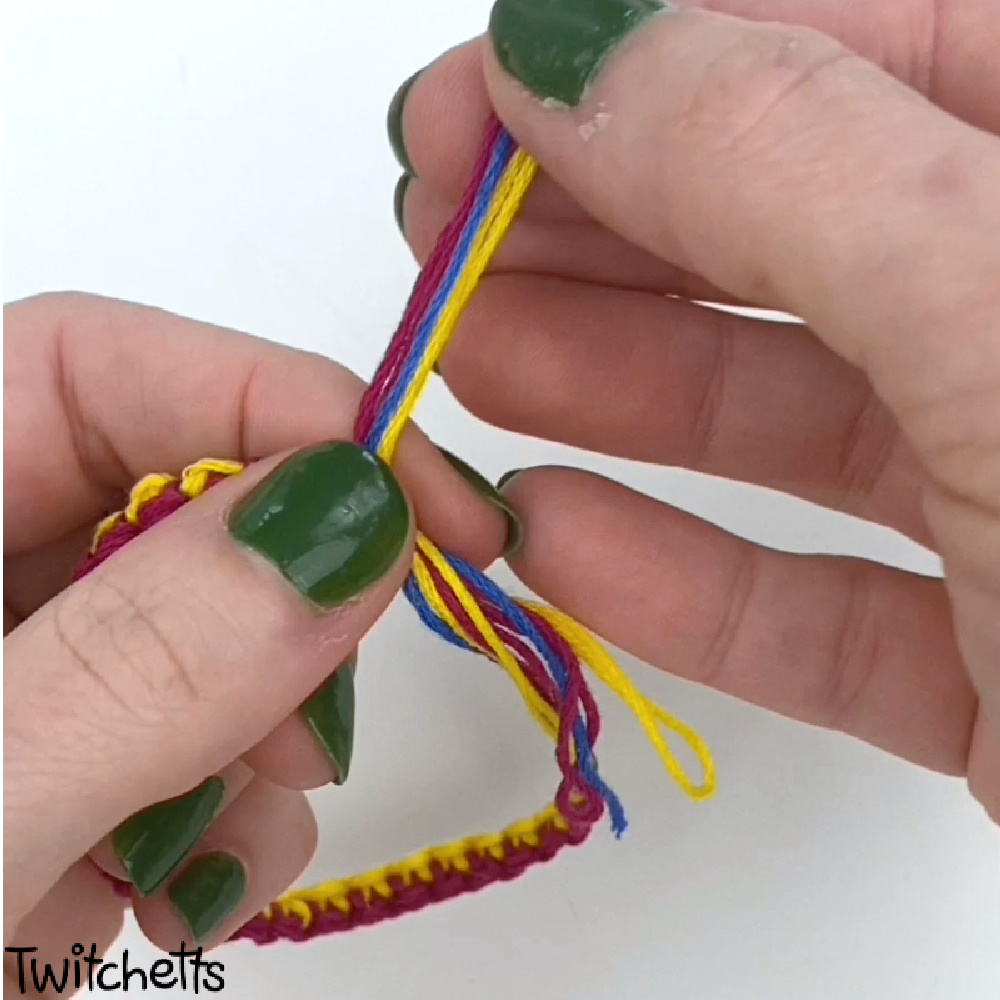
- Carefully feed the crochet hook through the loops from the right-hand side.
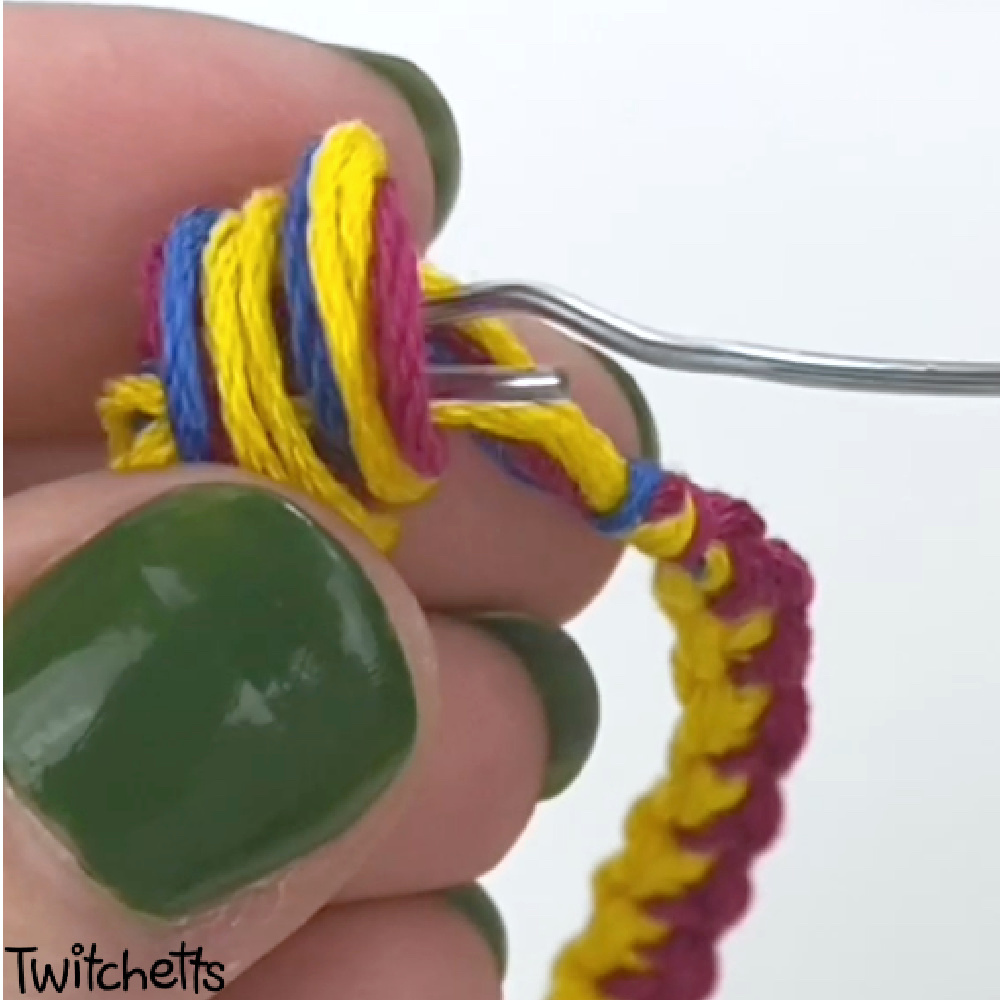
- Go through both loops until your hook makes it out on the left side.
- Wrap the bracelet ends over the hook. This is just to grab them it doesn't matter which way you feed them over the hook.
- Slowly pull the hook back out the right-hand side.
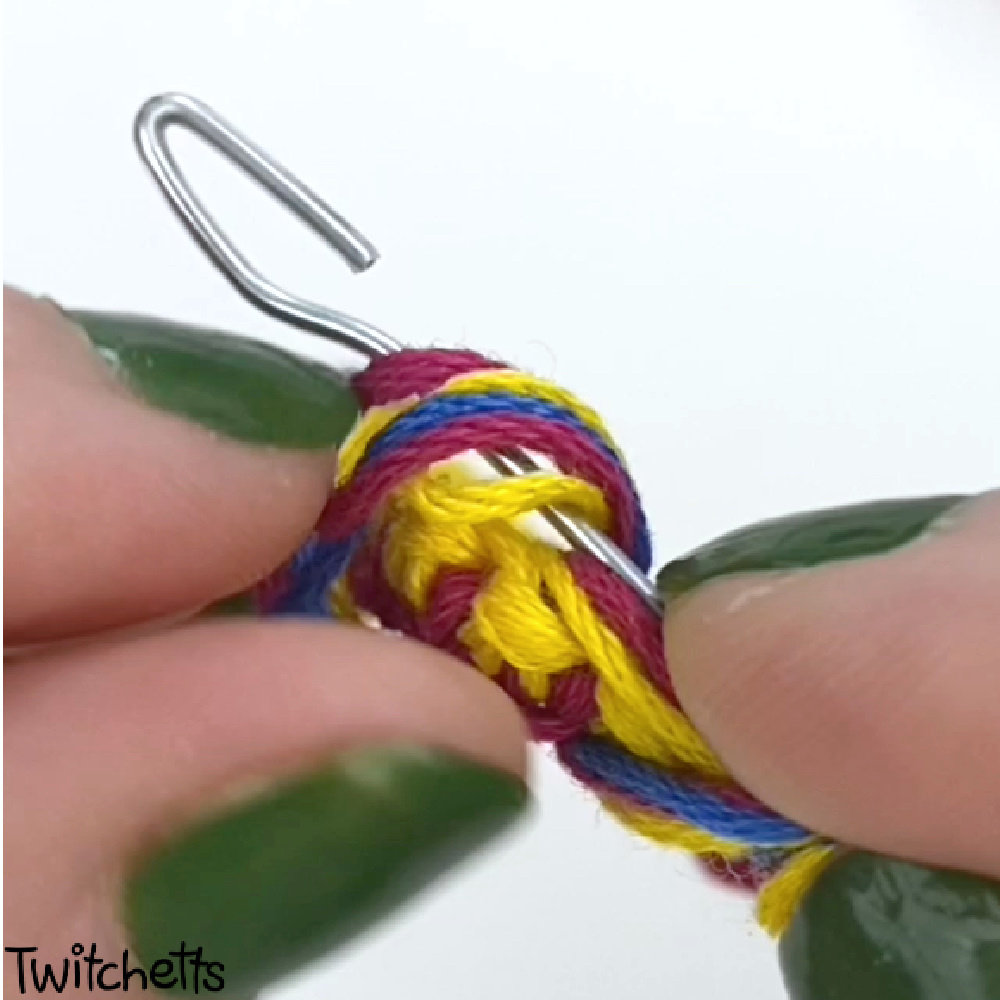
- Take the hook off of the strings.
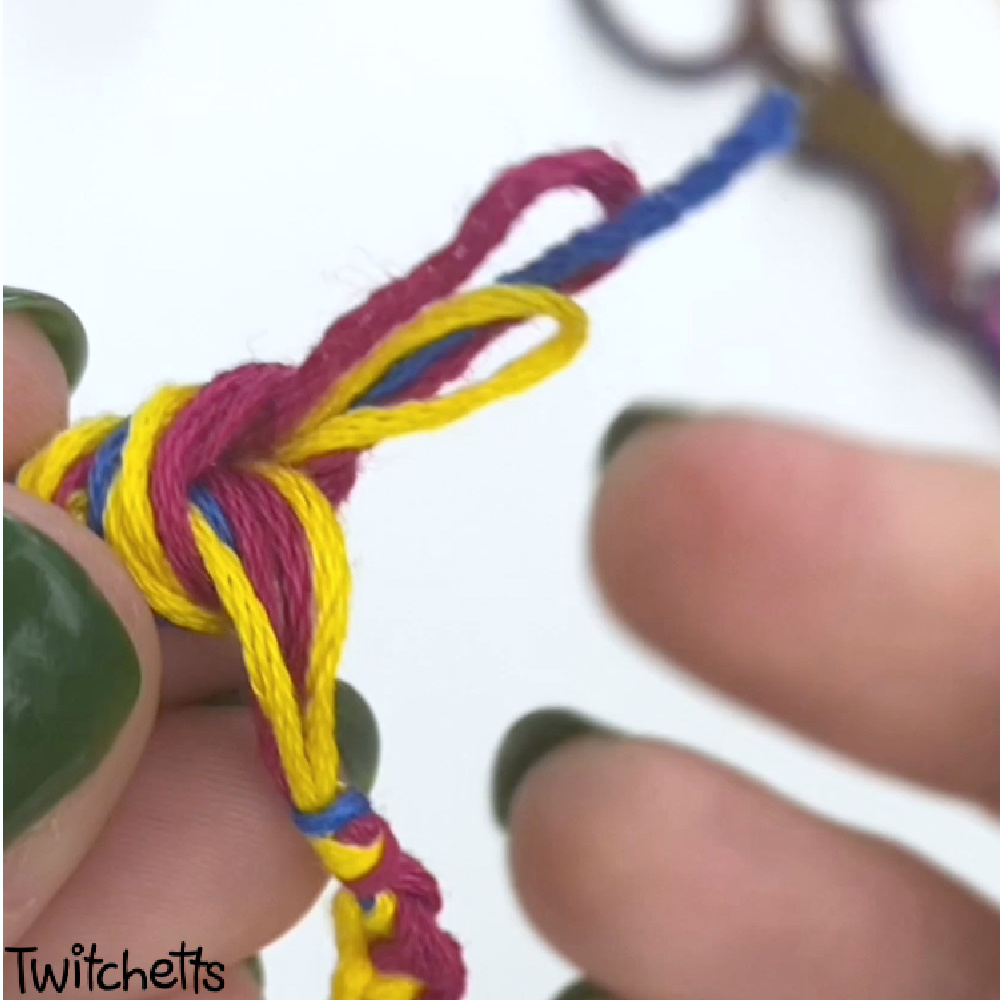
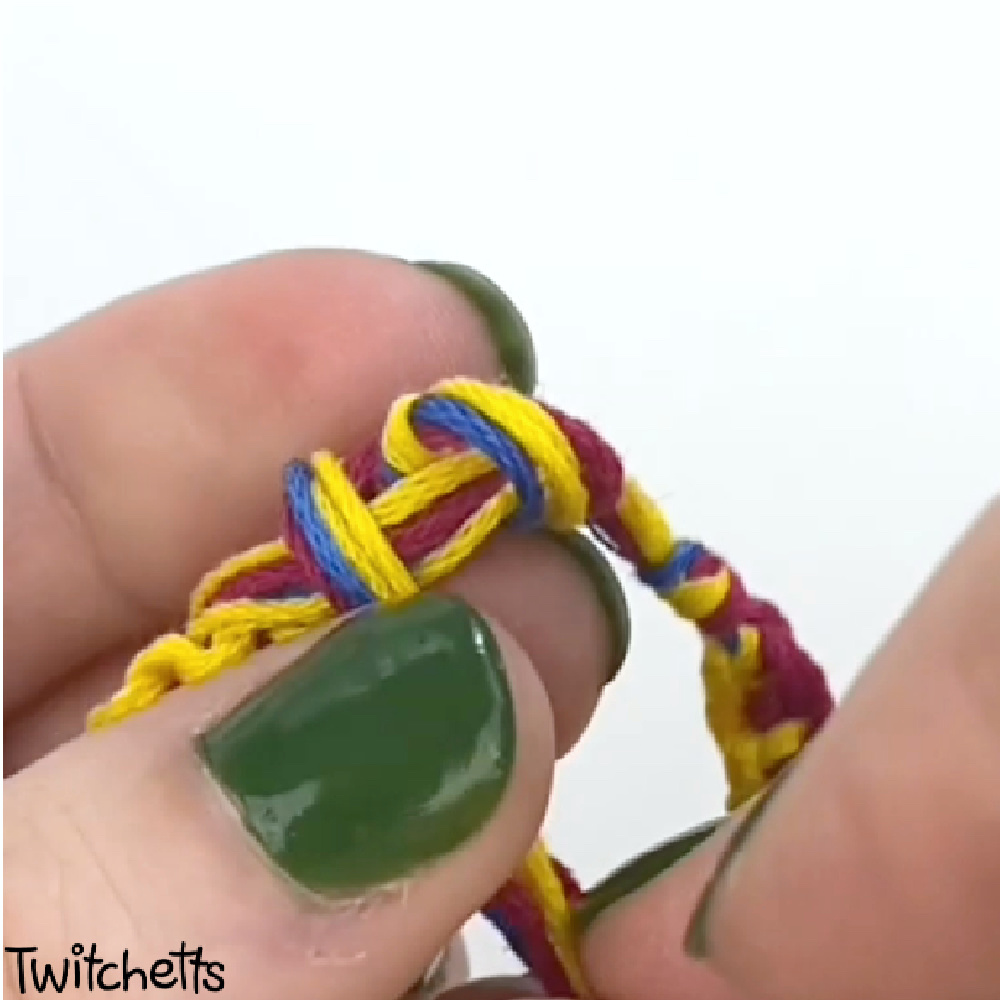
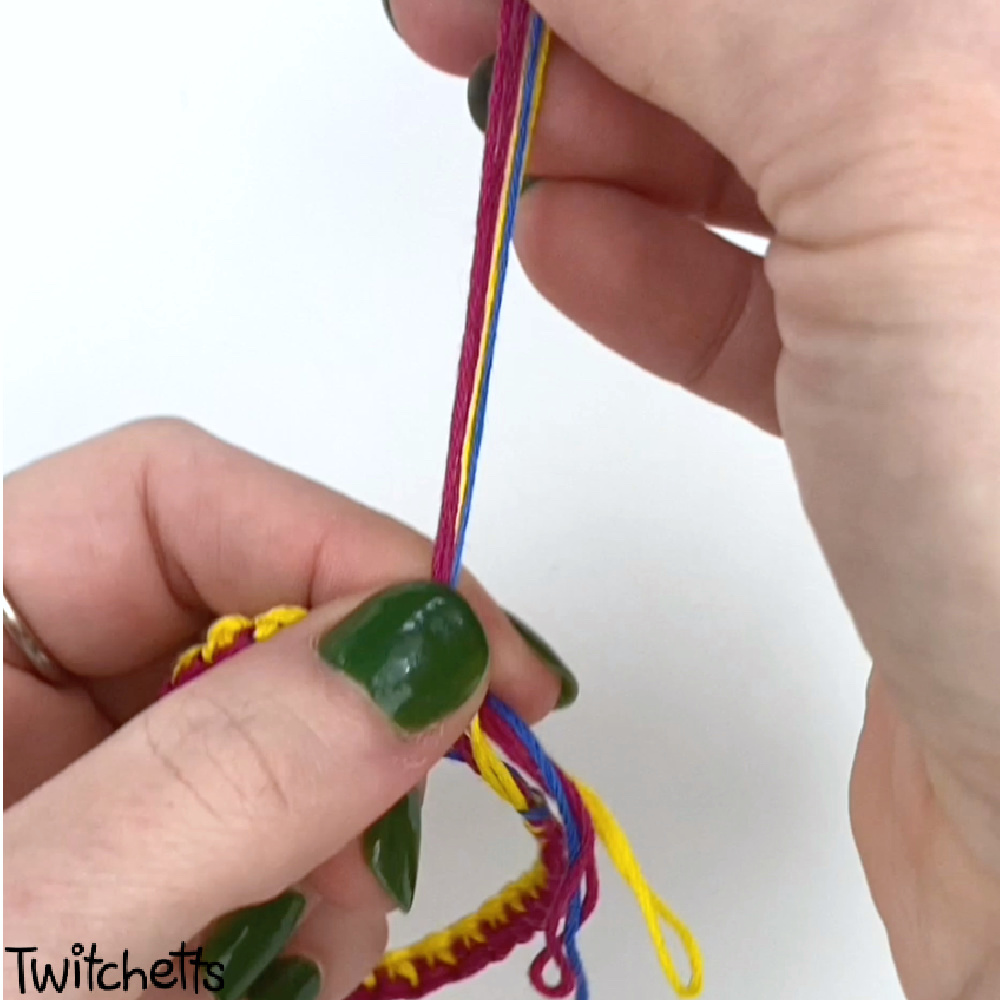
- Pull the end strings to start to tighten the slip knot. Make sure the knot isn't going to land on the bracelet. You can unloop the strings on the left side. Then pull nice and tight.
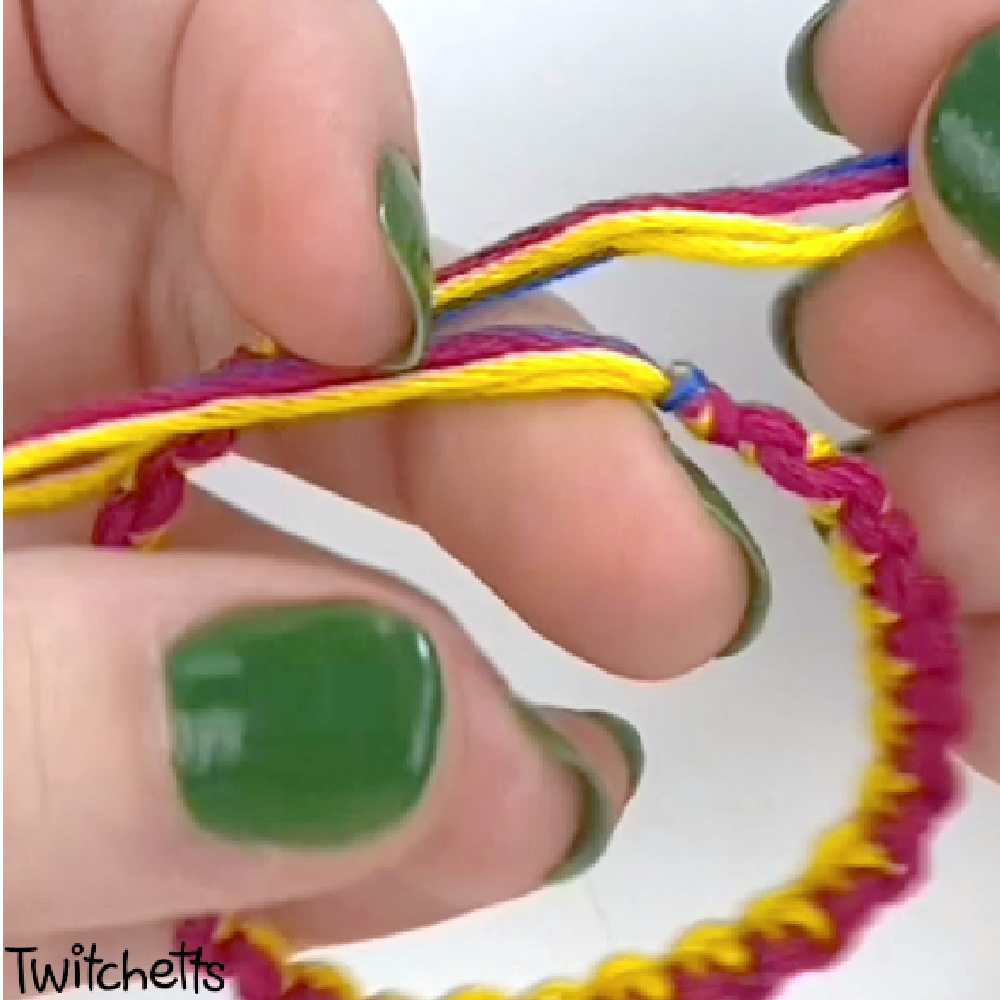
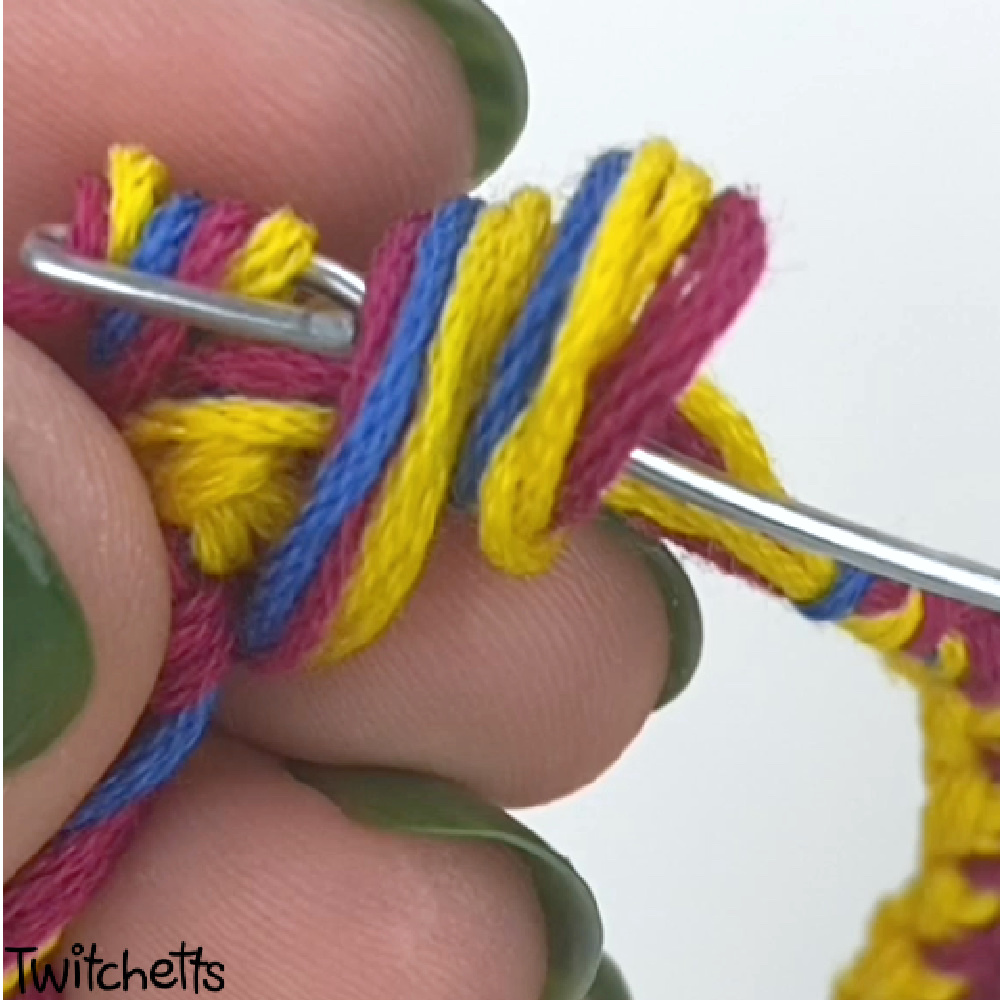
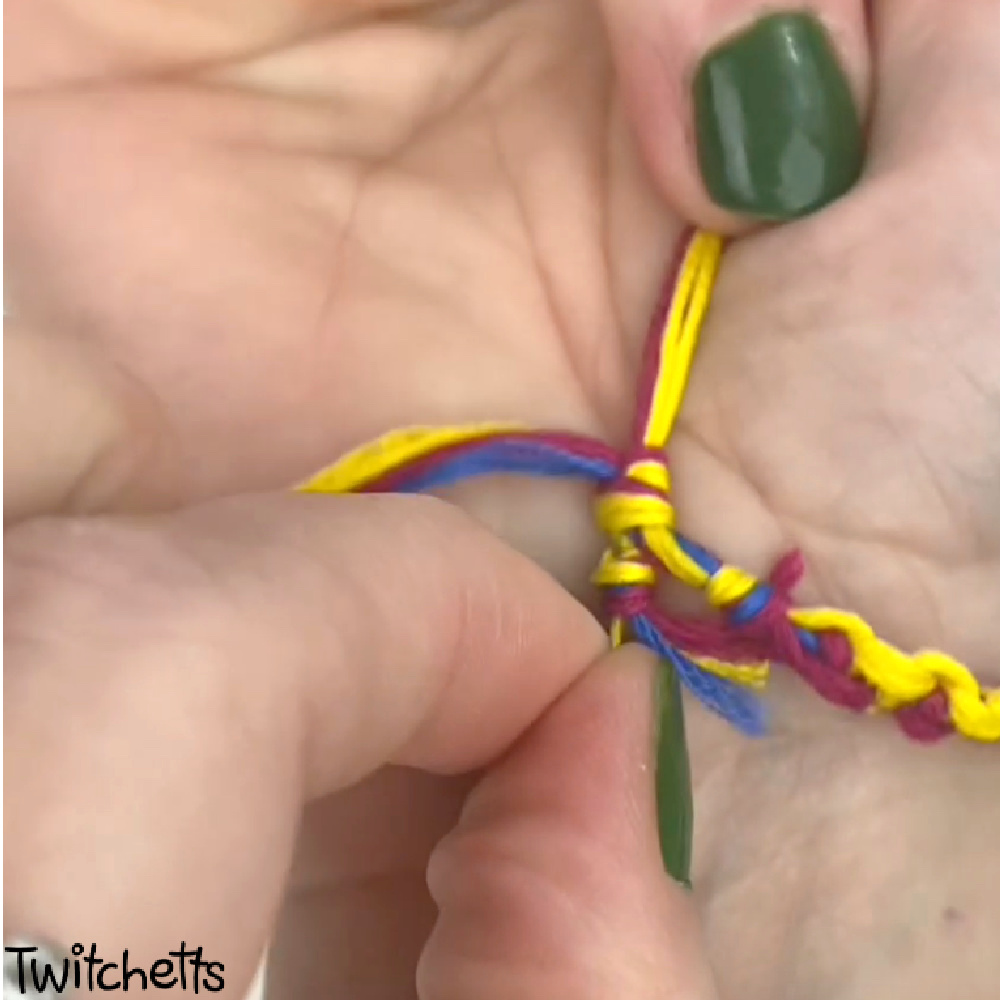
- Now you can slide the knot to expand the bracelet! To do this just hold the knot with your left hand and pull the bracelet to the right.
- Test how wide you need it to be to put the bracelet on. The wider you need it to be the more extra string will hang when your bracelet is on and tightened.
- When you take the bracelet off, note how far it needs to adjust in order to get it onto your wrist. I needed the knot to be about an inch down.
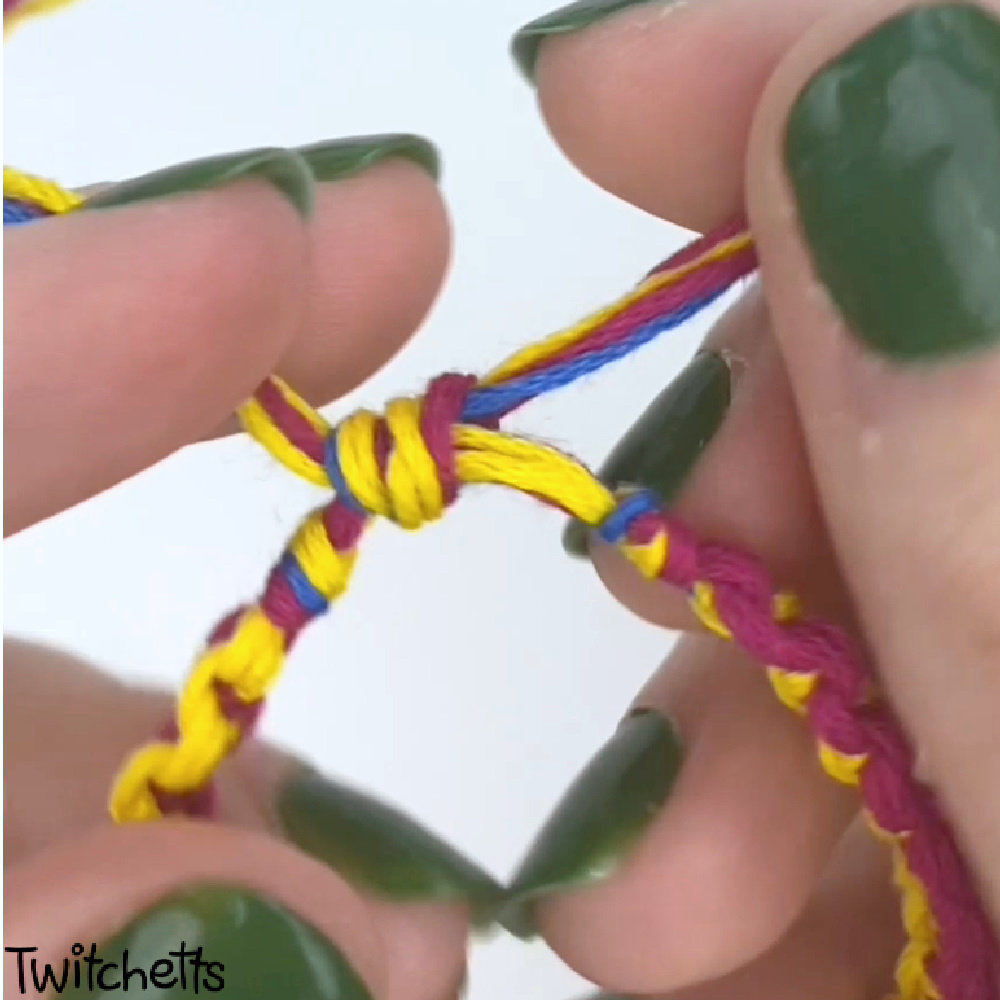
- Then tighten the bracelet by sliding the knot to make the bracelet the smallest it can be. This is so you have enough string to tie it off.
- Create a knot where you took note of the bracelet's expanded size.
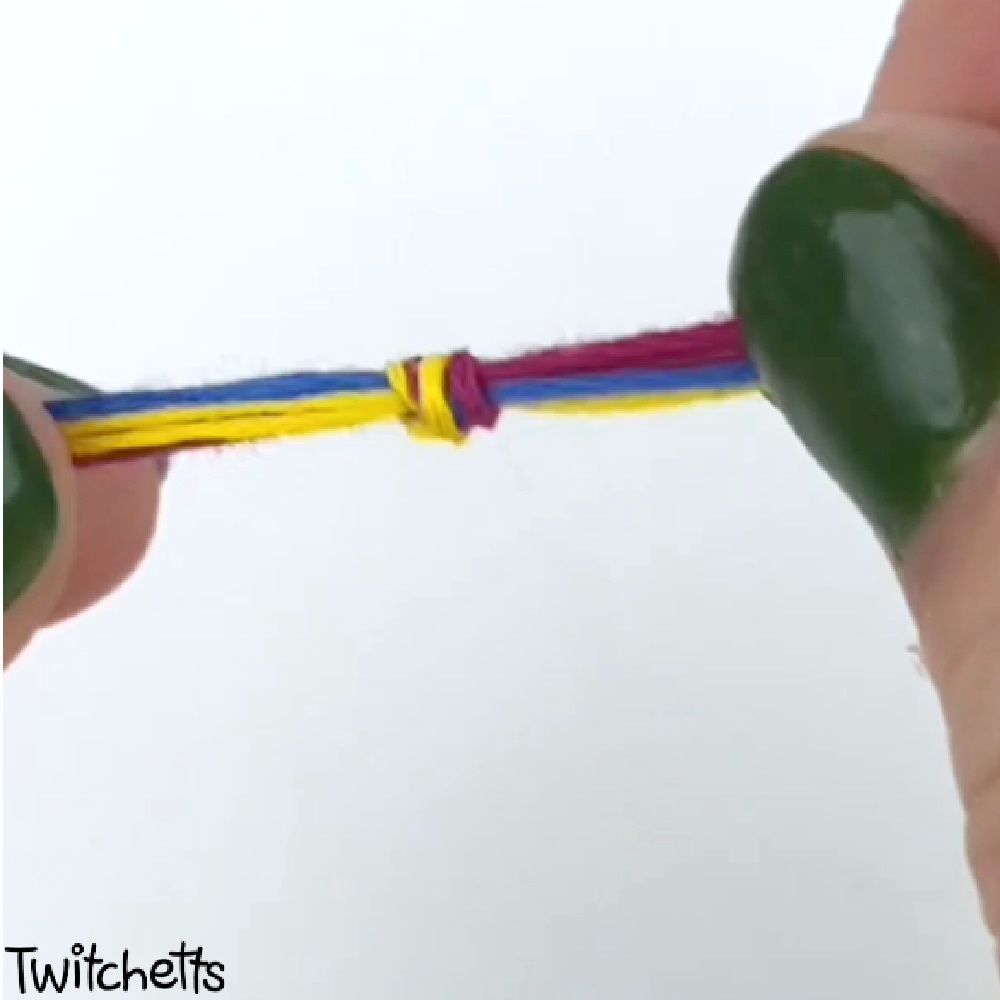
- This knot placement will make it so your bracelet will only adjust open to that point!
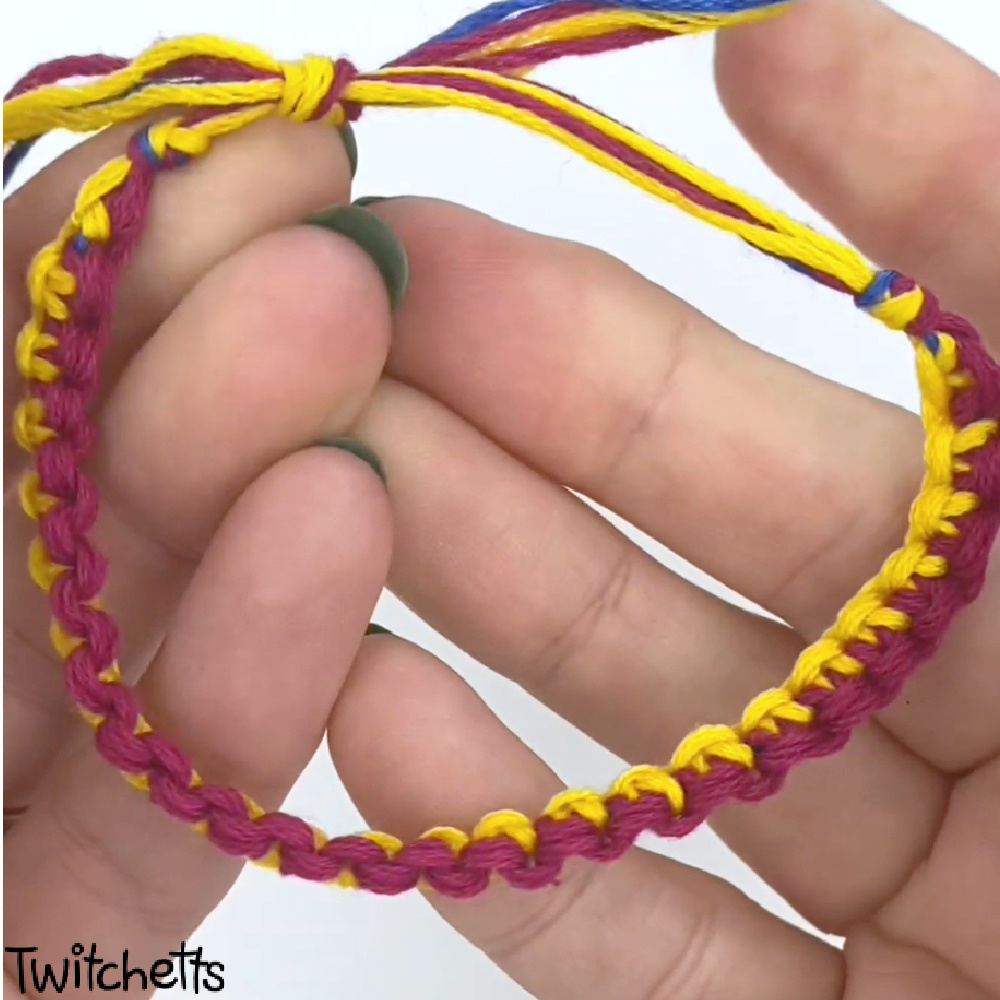
- Trim the extra ends past that knot.
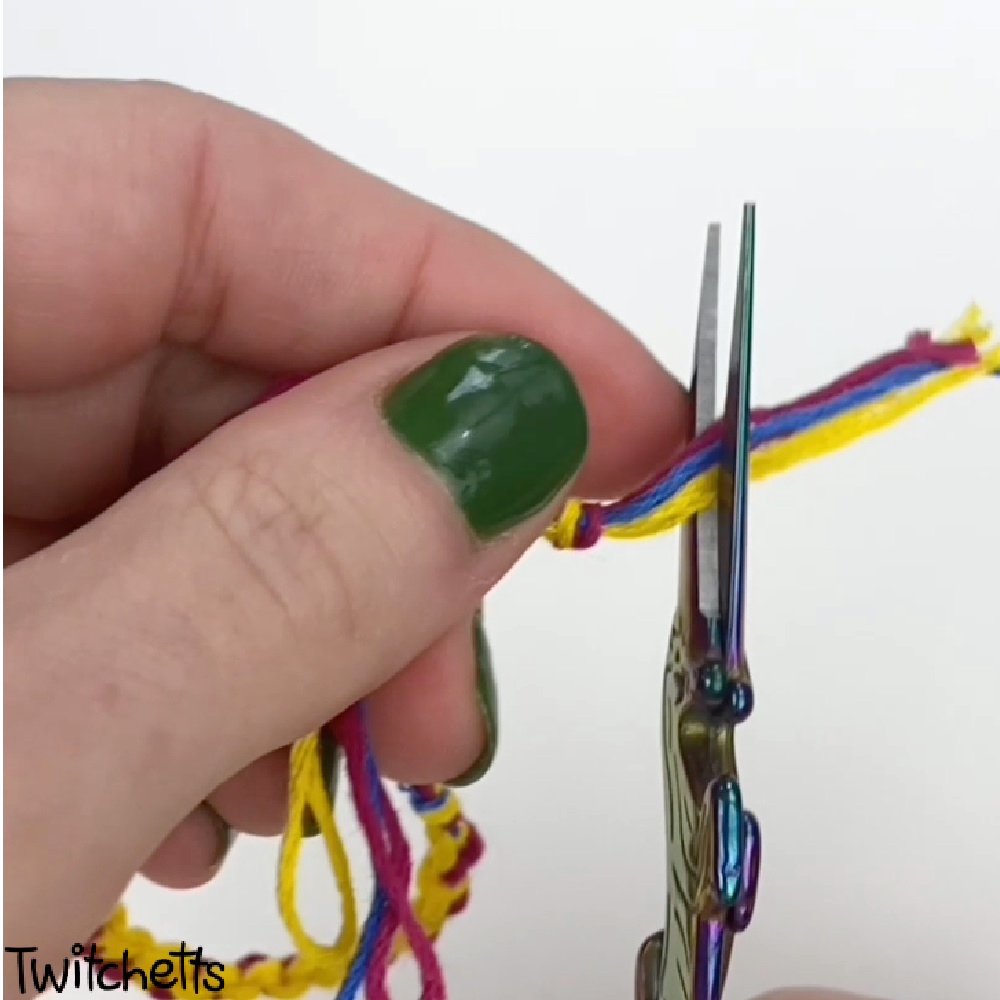
- To trim the other ends, place the bracelet on your wrist. The knot you just made won't have extra string, (bottom in this image) but the sliding knot string still does. This string is good to grab with your finger to tighten your bracelet so you will want to leave just a little bit of slack.
- Trim that end a little bit.
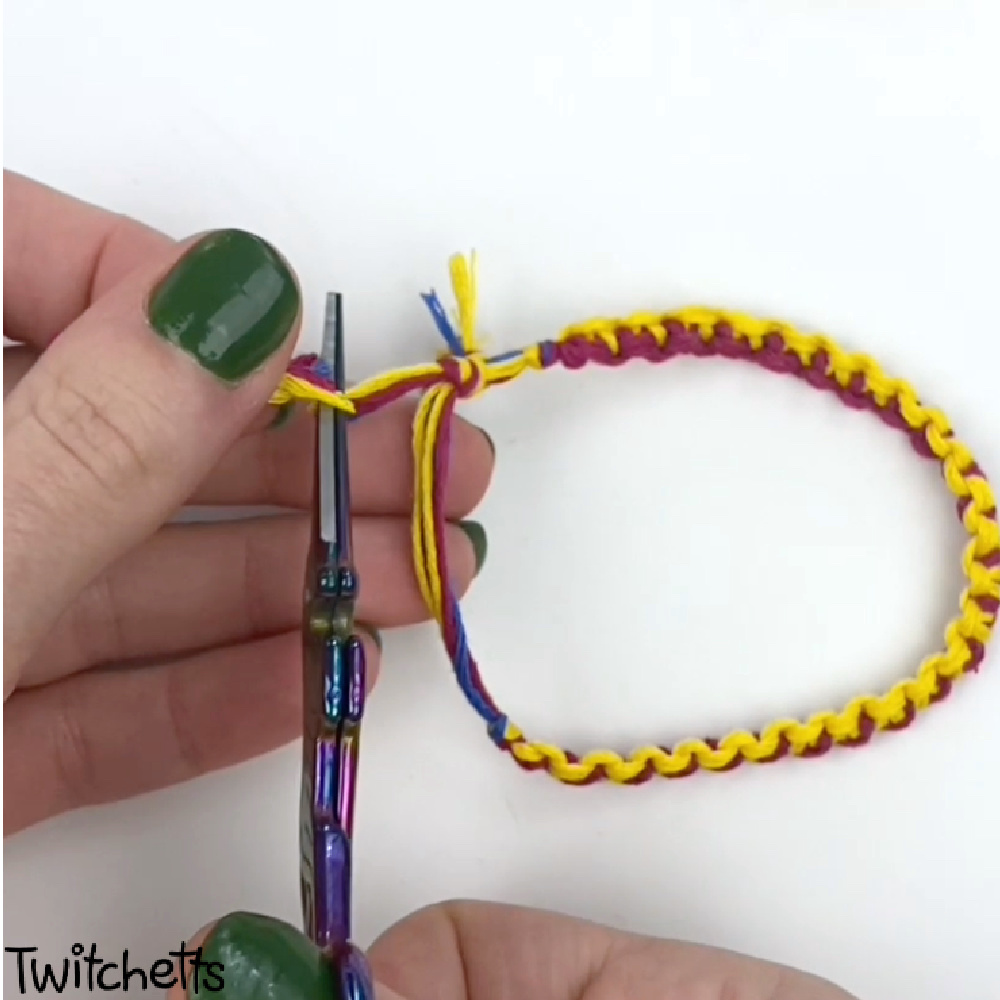
- Then your adjustable bracelet knot is finished! Using this slip knot you can put your bracelets on and off with ease, and by yourself!
More crafts for girls
- First Friendship Bracelet – If this pattern is a bit difficult, try this twisted bracelet instead.
- Castle Crafts – If your girls love princesses, they’ll love these castles.
If you love this easy friendship bracelet tutorial, share it by pinning or sharing them on Facebook.
This site wouldn’t be here without shares from people like you, and we are so thankful that you took the time to visit Twitchetts.
Know a friend who is looking for an adjustable bracelet knot tutorial? Please share this tutorial on Facebook or save it to your favorite board on Pinterest.