Learn how to make the most important friendship bracelet knots with these step by step instructions. Choose from the forward knot, backward knot, forward-backward knot, backward-forward knot, and the square knot. Mastering these techniques will take your string bracelet skills to the next level.
Friendship Bracelet Knots
These friendship bracelet knots are super important to learn if you want to master making string bracelets. Watch the video tutorial or follow the step-by-step instructions to learn how to make each one.
Friendship bracelets are a classic tween craft. You can make them in various colors or styles.
But to make amazing bracelets, you have to master the basic knots. Once you have figured out the basic knotting technique, you can try a variety of patterns and make some really cool friendship bracelets.
Types of knots for bracelets
- Forward Knot – Use this technique in the classic candy stripe pattern or a spiral bracelet.
- Backward Knot
- Forward Backward Knot
- Backward Forward Knot
- Square Knot – See this knot in action in the flower bracelet
Whether this is your first knot or your 1,000th. With a little practice, you will be making your own bracelets before you know it!
Disclosure: Some of the links in this post are “affiliate links.” This means if you click on the link and purchase an item, we may receive an affiliate commission.
No time to practice string bracelet knots now? Pin it for later!
If you’re currently in research mode, that’s ok! Pin this to your favorite Pinterest board. That way you’ll be able to grab instructions when you’re ready!
Tips for friendship bracelet ties
- Choose different colors that compliment each other.
- Start with simple bracelets and work your way up to the complicated ones.
- Play with the string tension. Knots that are too tight will look too small. Knots that are too loose will have holes in them.
- Practice! Practice! Practice! This craft takes practice to get right. But the good thing is, the embroidery floss is inexpensive and you can give all your mistakes away!
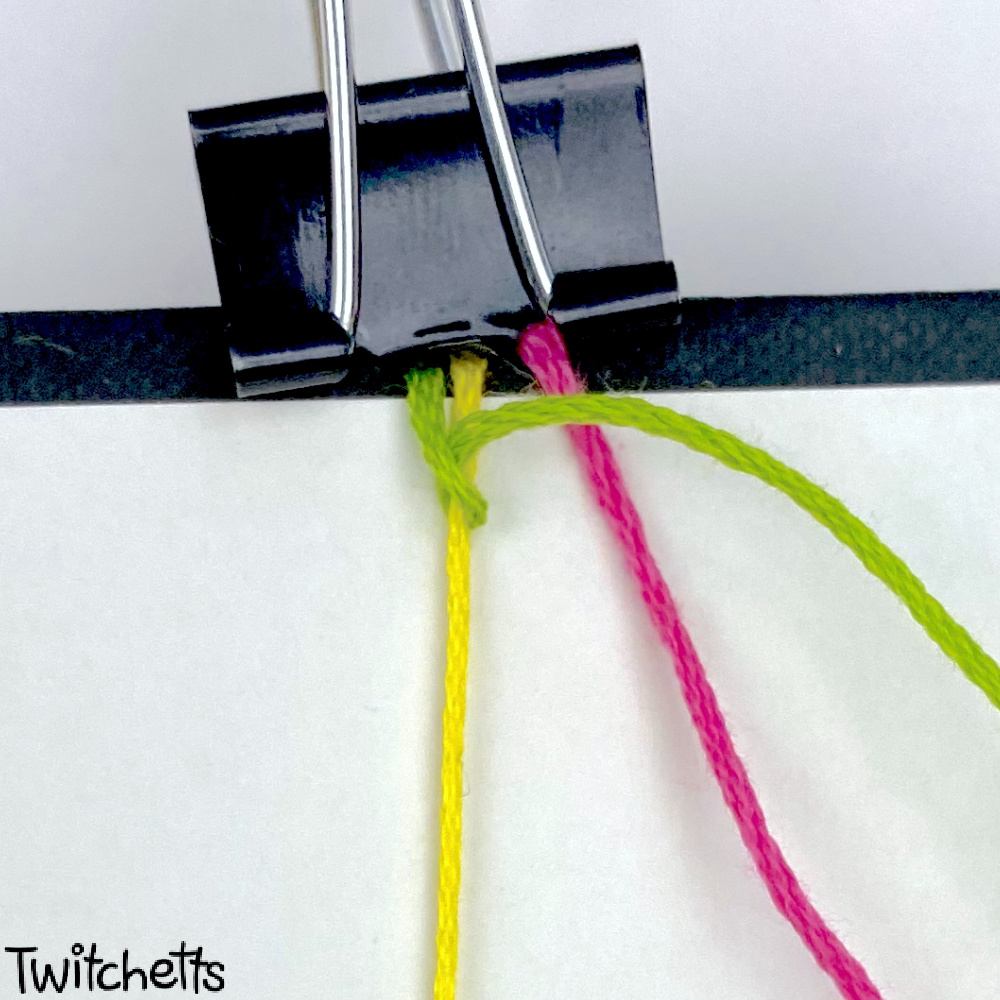
How to secure embroidery thread.
To get really good results, you want to make sure that the embroidery thread is secure while you’re creating the knots. Here are a few ideas for securing your string.
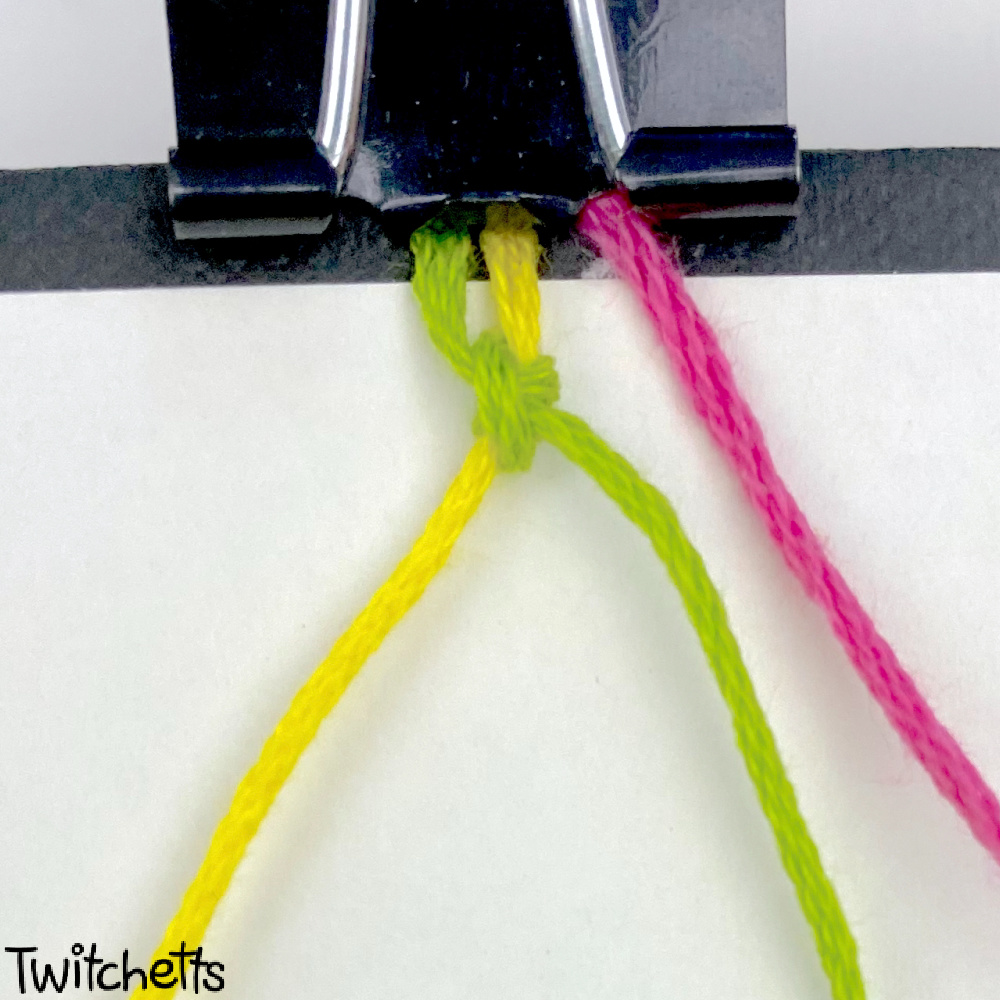
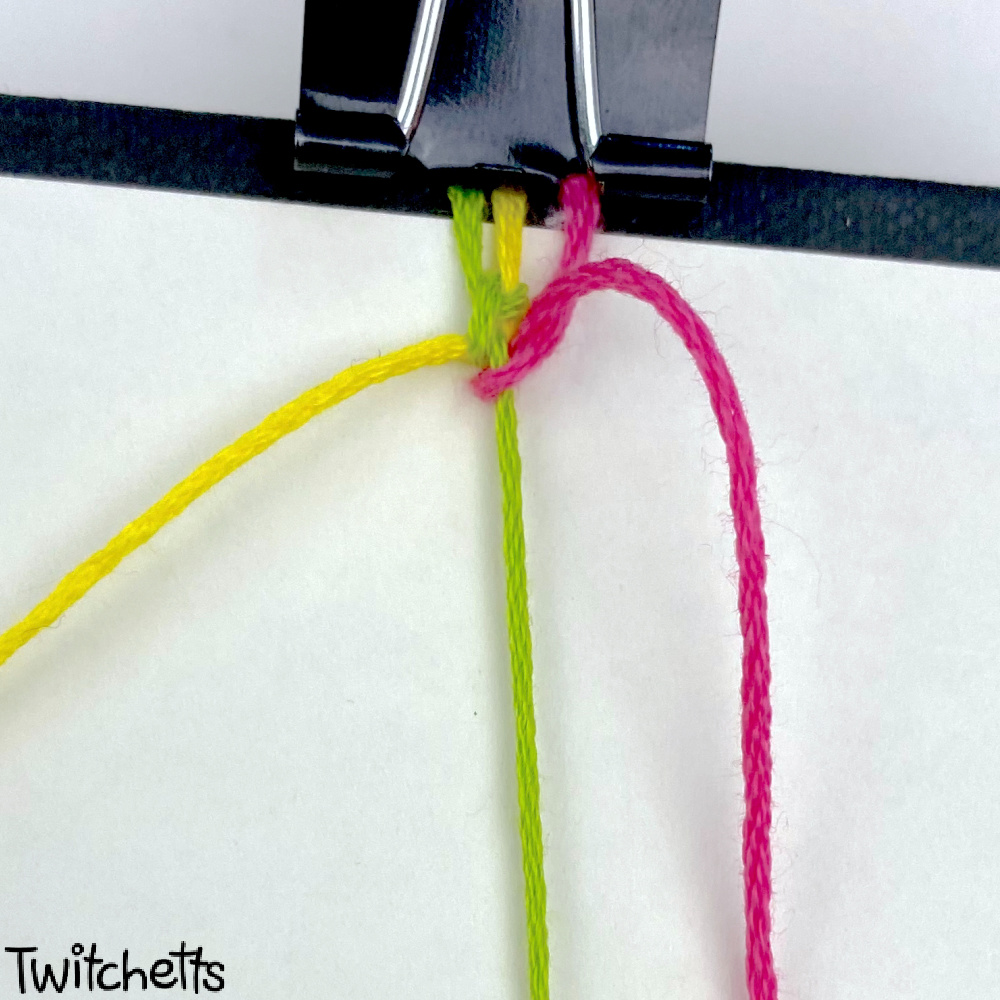
- Use a binder clip to secure it to a flat surface.
- Place a pillow on your lap and safety pin the floss to the pillow.
- Clip the string onto a clipboard.
- Use masking tape to secure it to a piece of cardboard.
You can use bracelet crafts in several ways.
- Make your own friendship bracelets and give them to your best friends.
- Hang them from your backpacks
- Use them as colorful gift wrap ribbons.
- Pass them out as handmade Valentines.
- Make them at a sleepover or summer camp.
- Create them during long car rides.
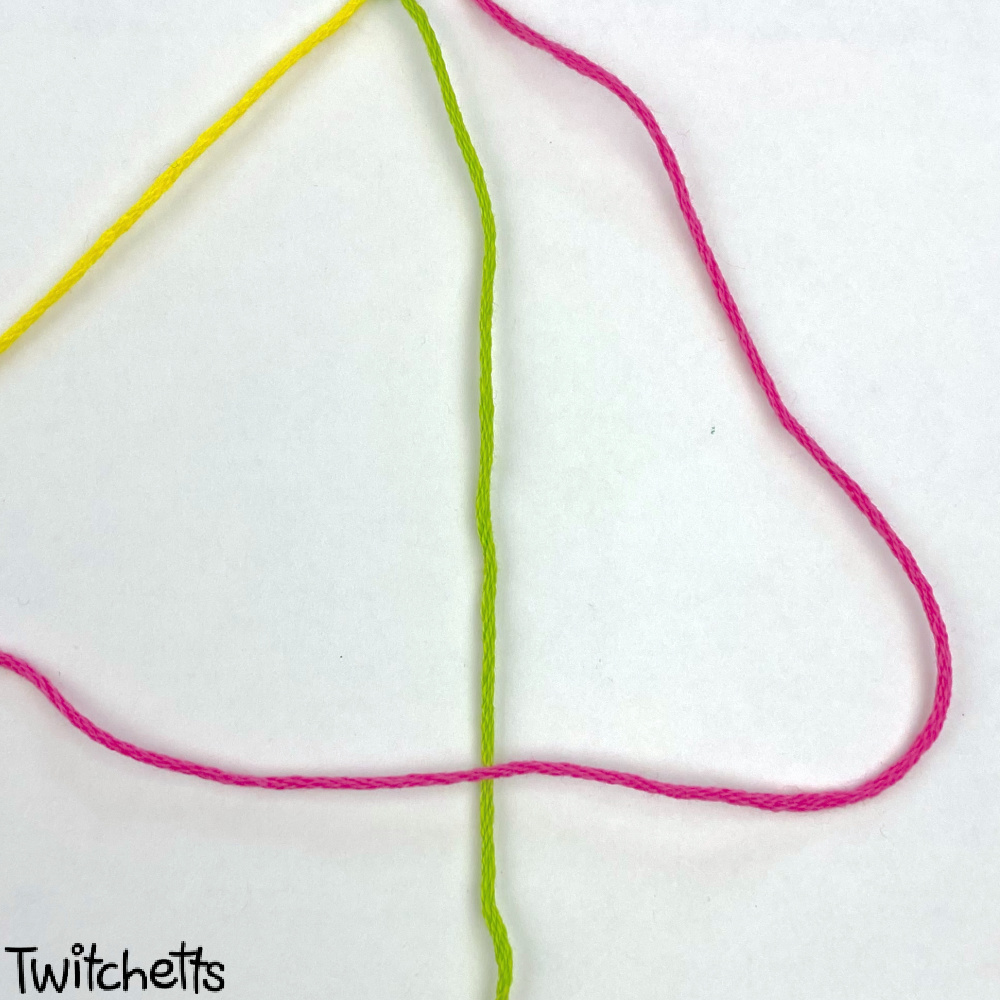
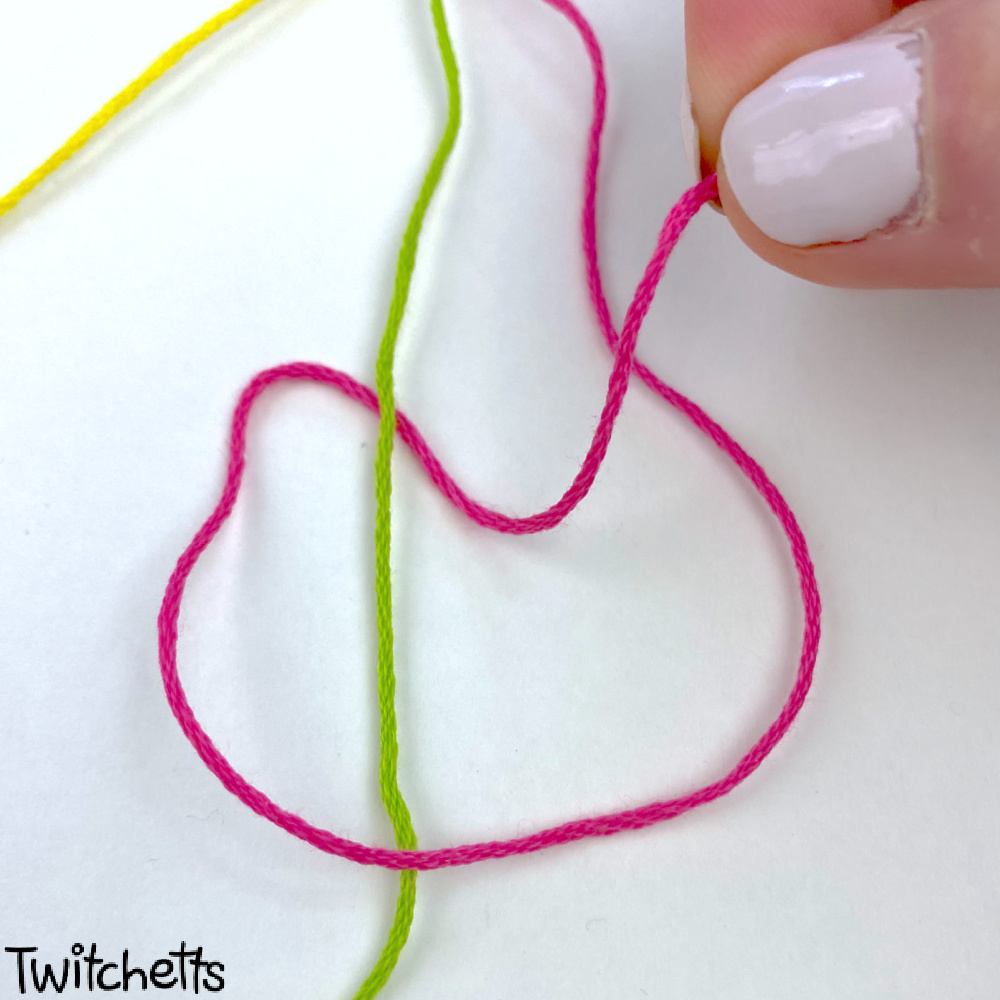
Basic Friendship Bracelet Knots
See the types of knots for bracelets step by step. These friendship bracelet knots are used in many string bracelet tutorials. Get to know these common bracelet knots to make lots of fun friendship bracelet designs!
Materials
- Embroidery Thread
Tools
- Scissors
- Clip
Instructions
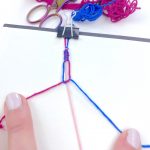
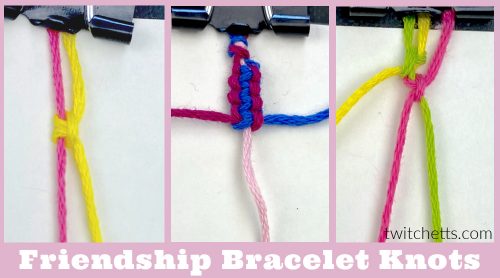
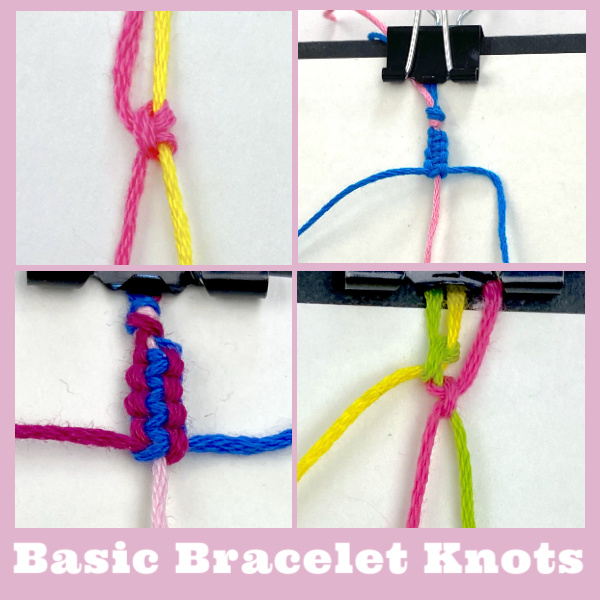
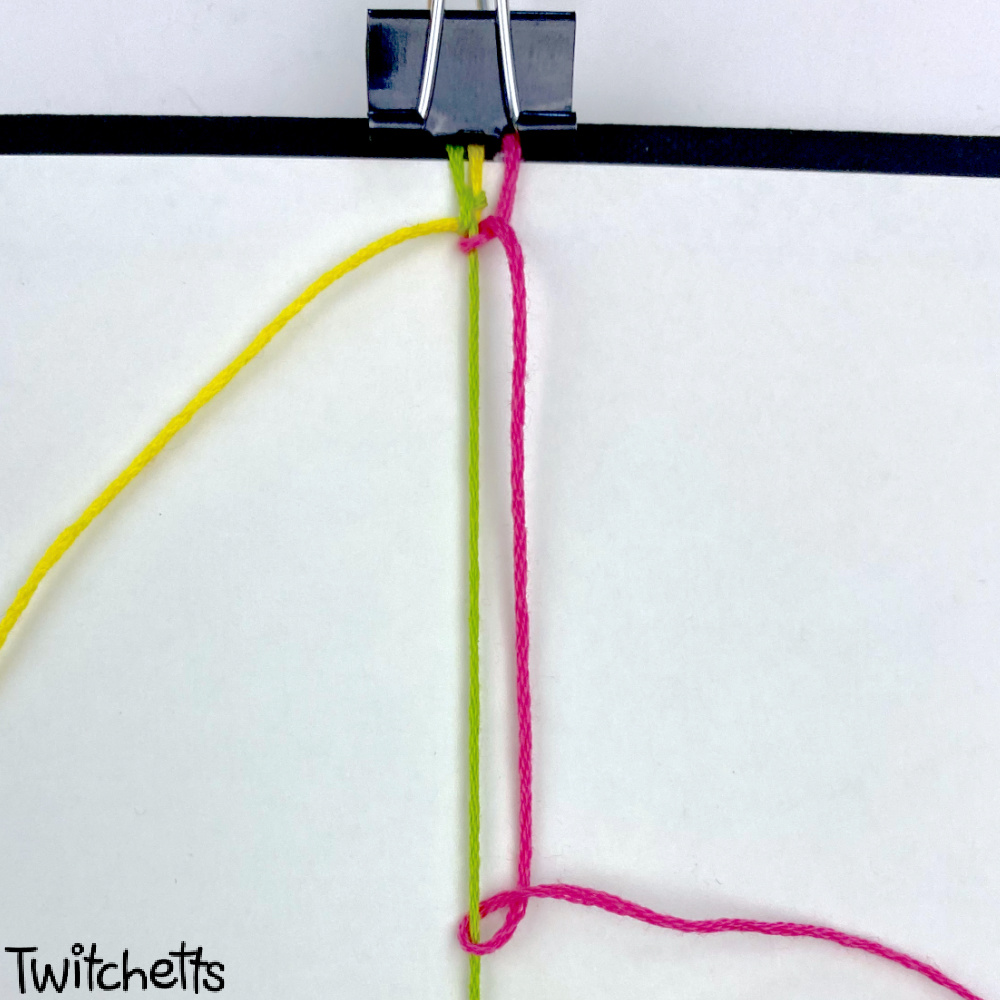
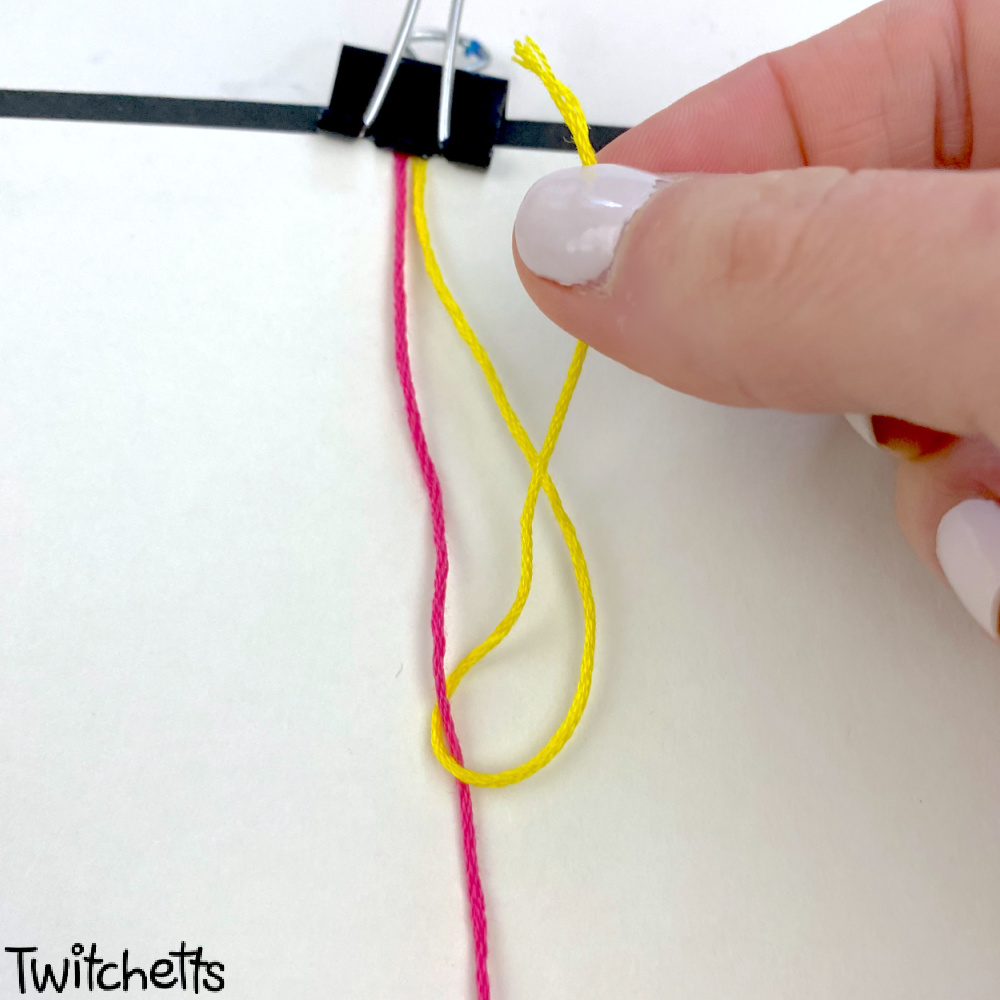
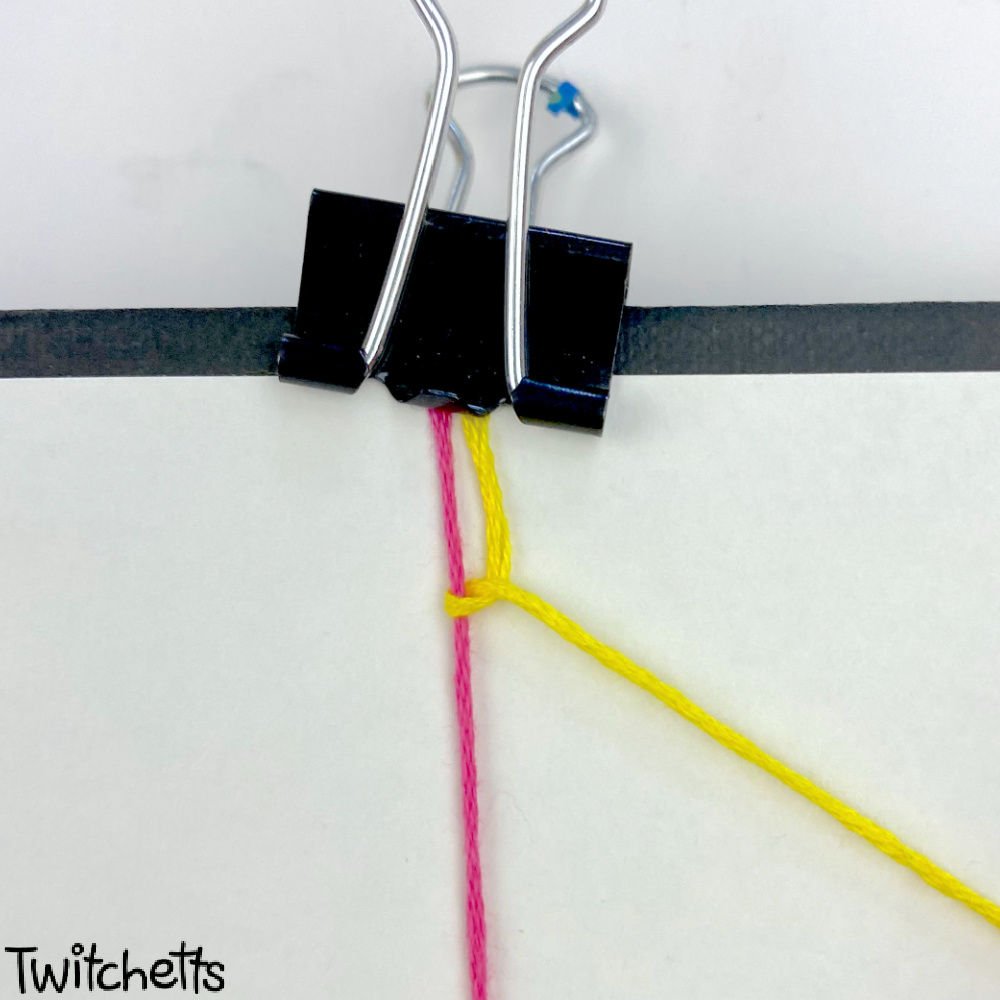
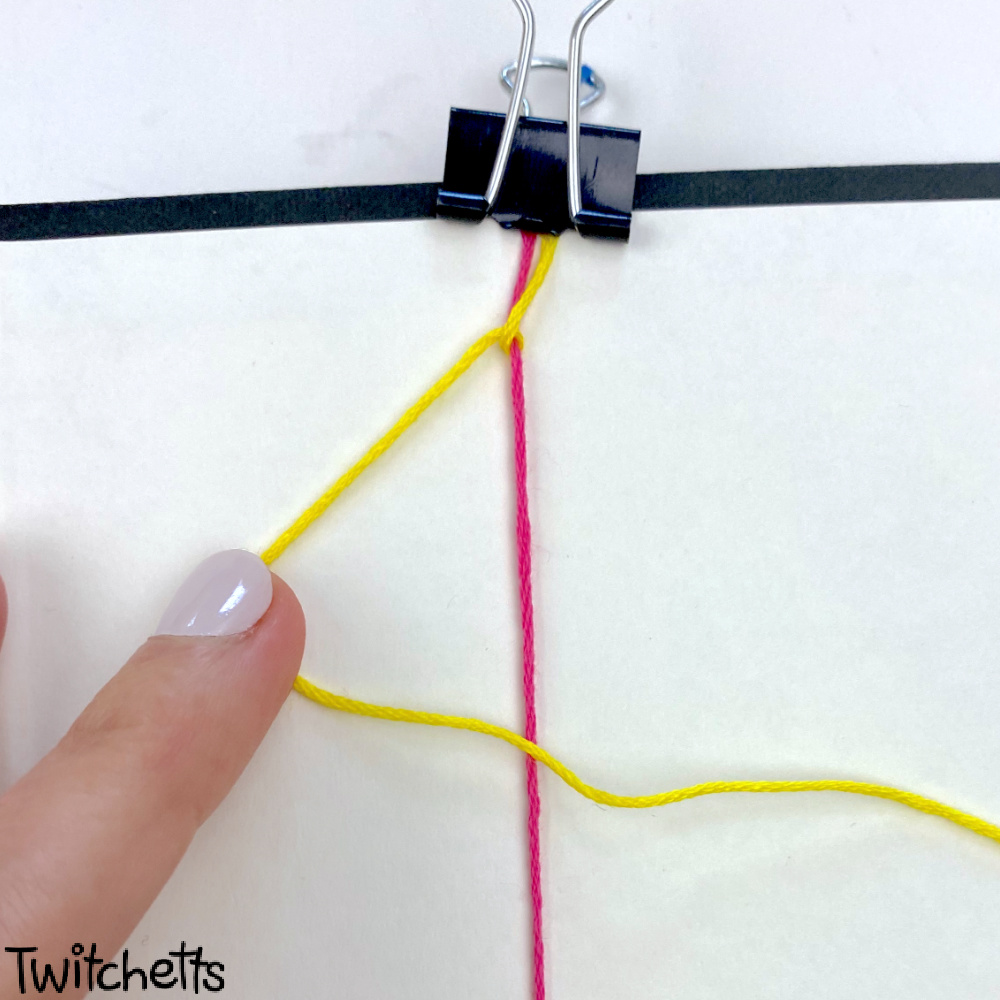
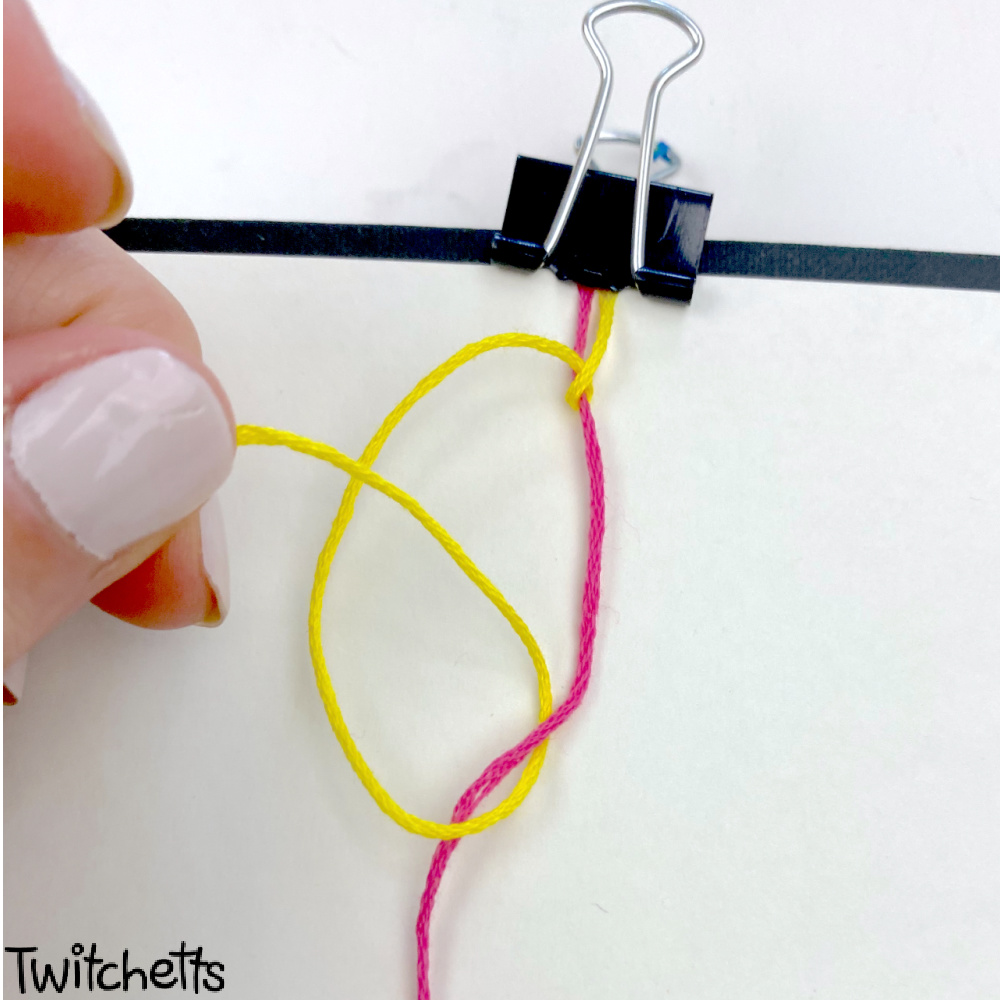
Forward Knot
To complete a forward knot you will be creating 2 hitch knots.
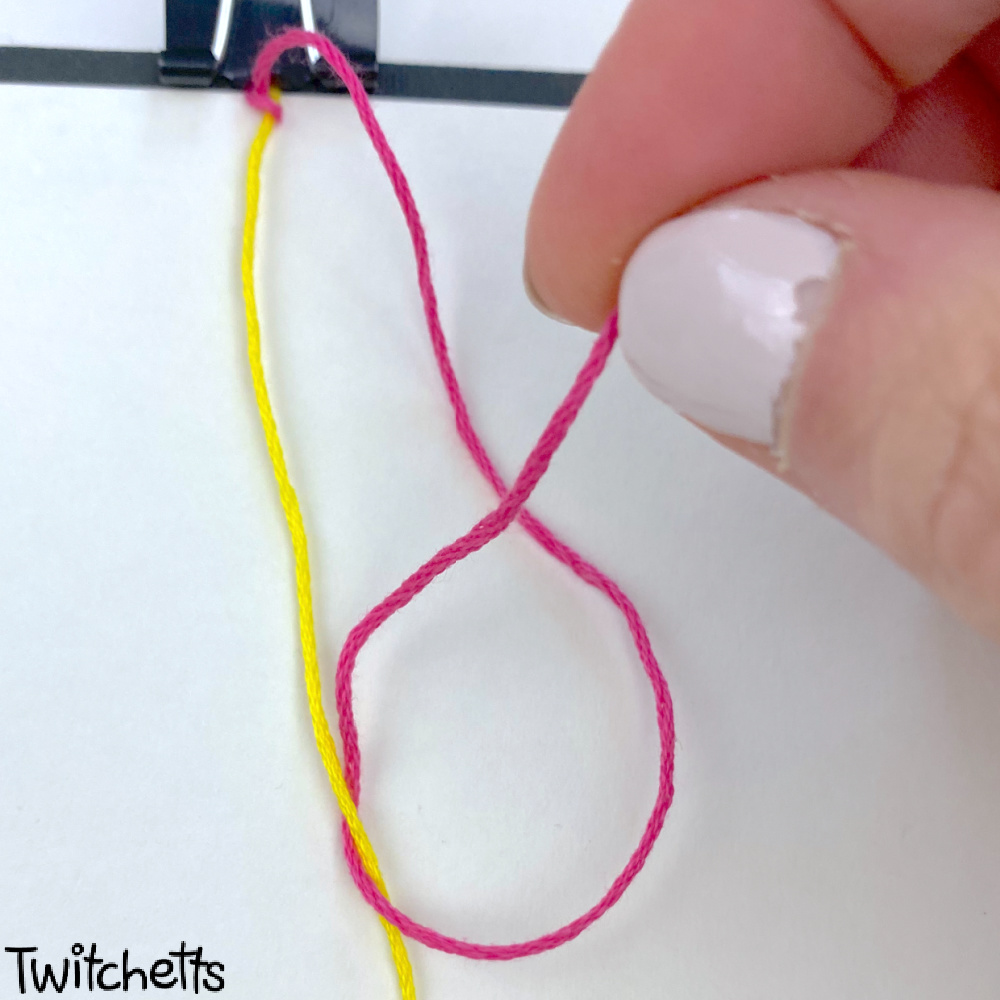
- Start your forward knot by creating a number 4 using the string on the left side. The top color will be the knot string. (green in image) The bottom base string will hold the knot and stay straight. (yellow in image)

- Bring your knot string (green in the image) under the base string (yellow) and up through the hole left by making the number 4 shape.
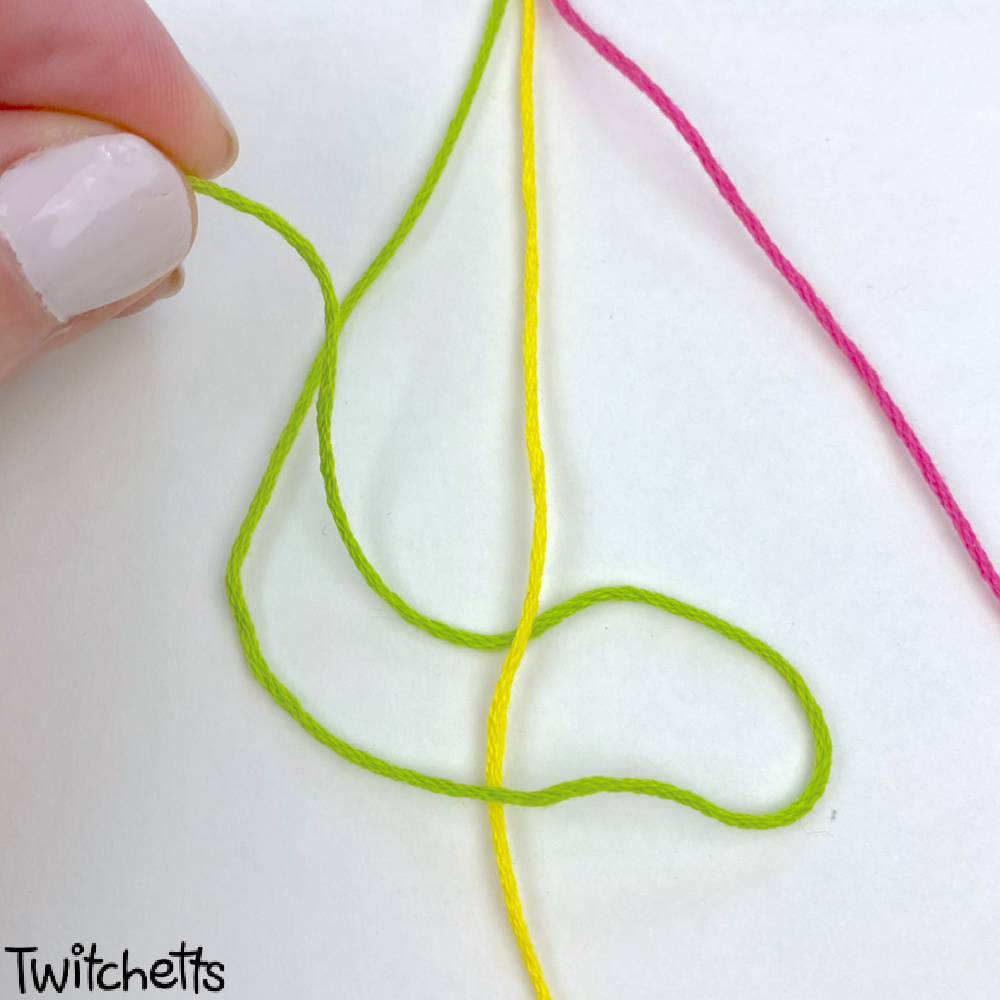
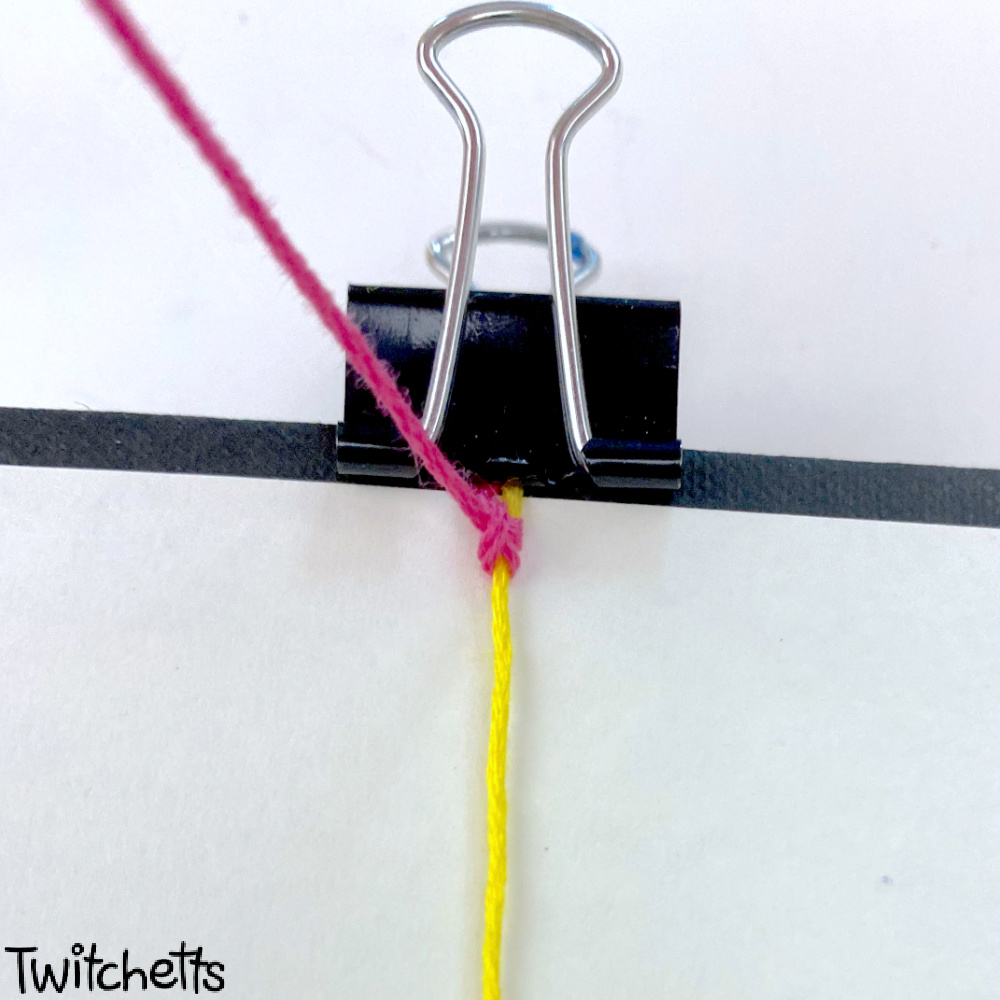
- Pull the knot string tight around the base string.

- While holding the base string tight slide the knot string up to the top of your design.
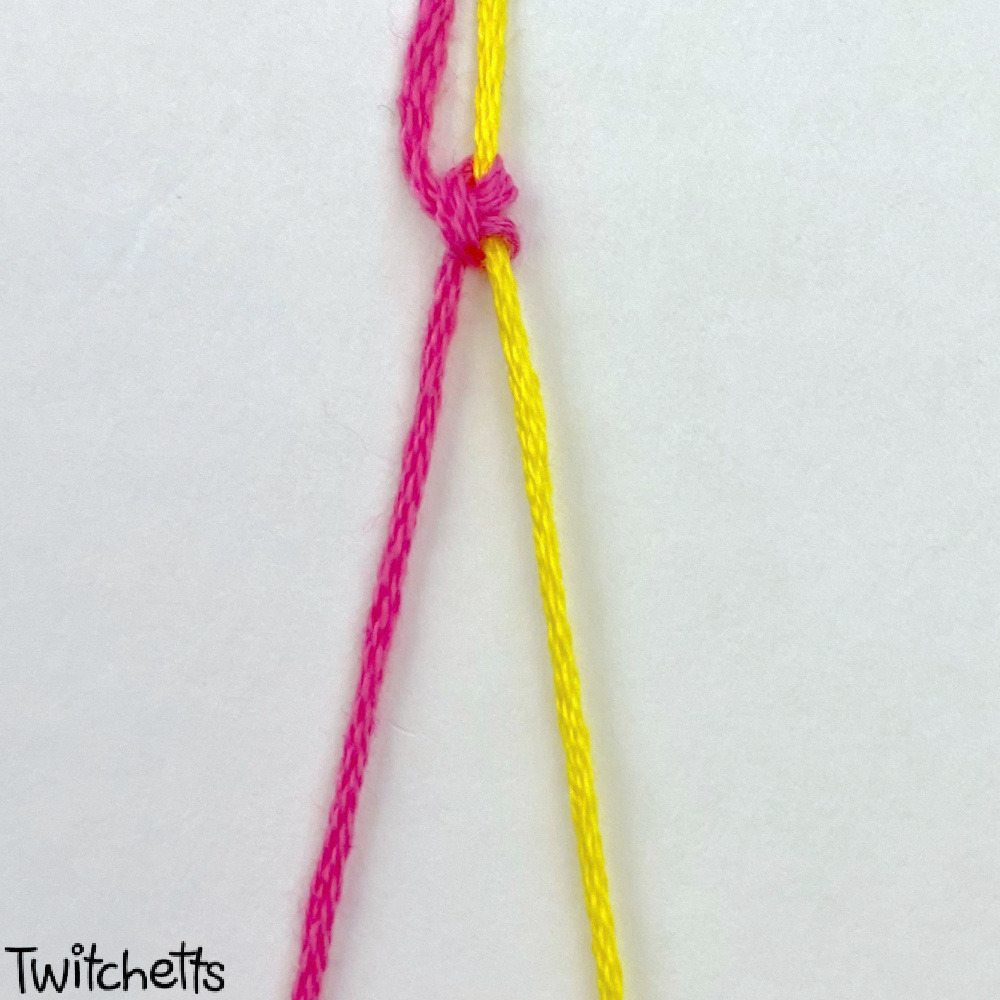
- To complete a forward knot you will do this twice. So repeat steps 1-4.
- When you slide up the second knot, the string will end on the right-hand side, moving the string forward!
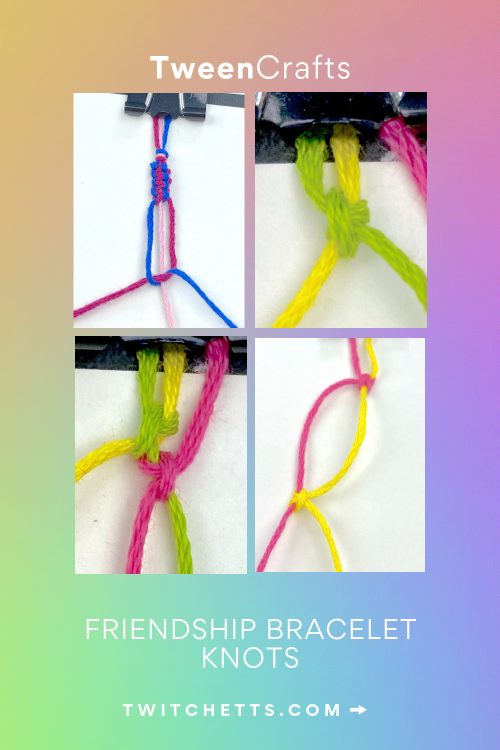
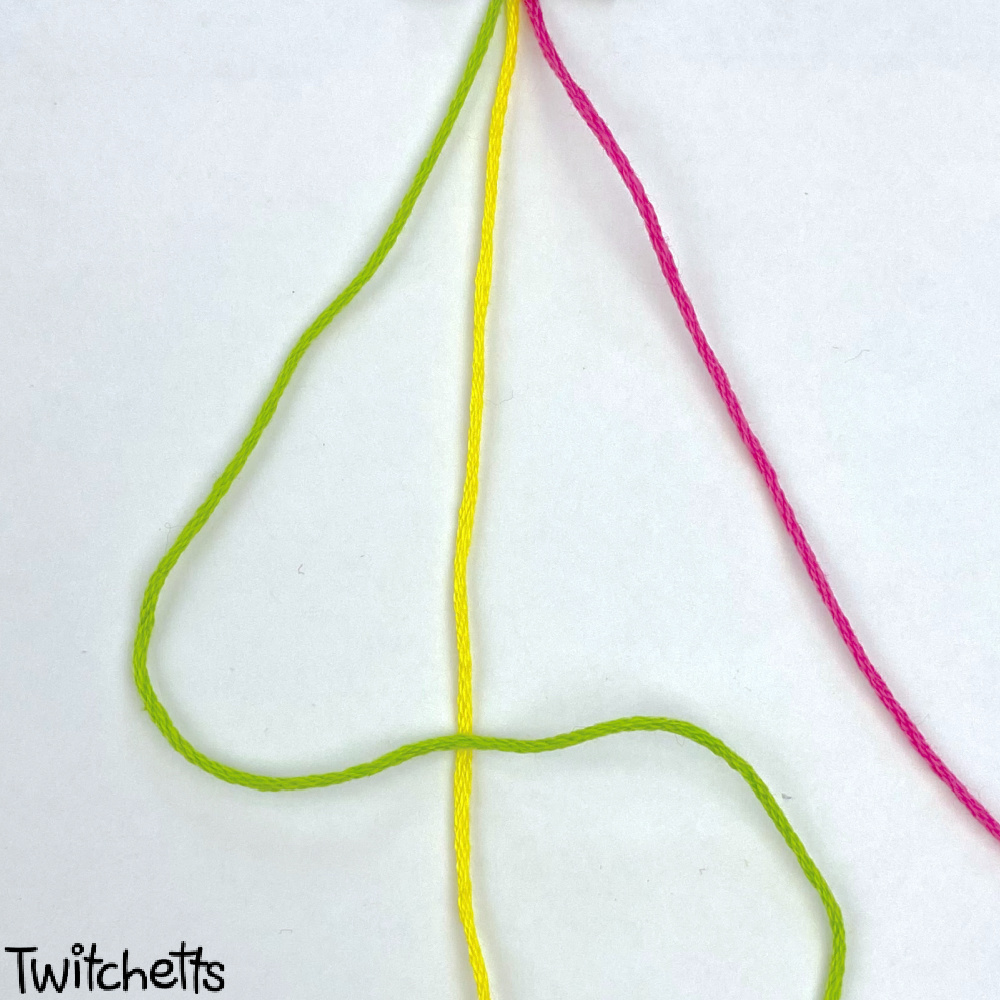
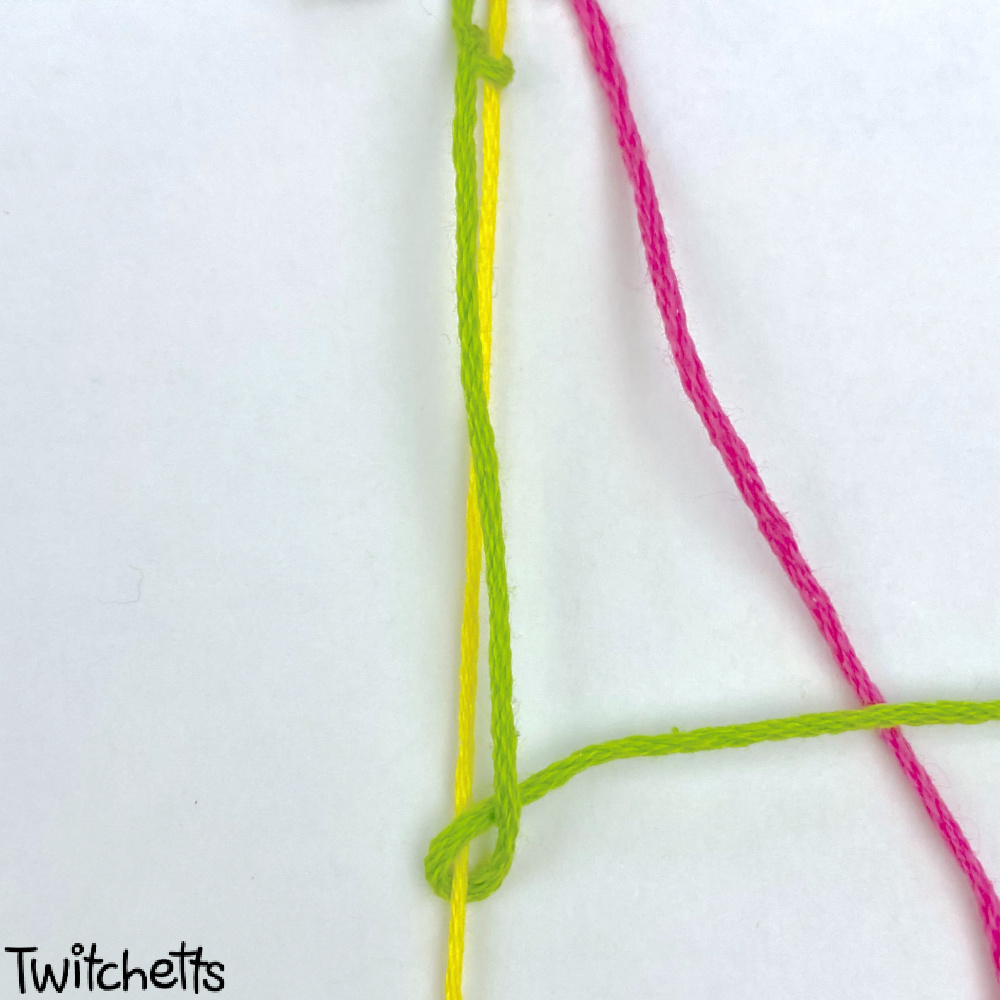
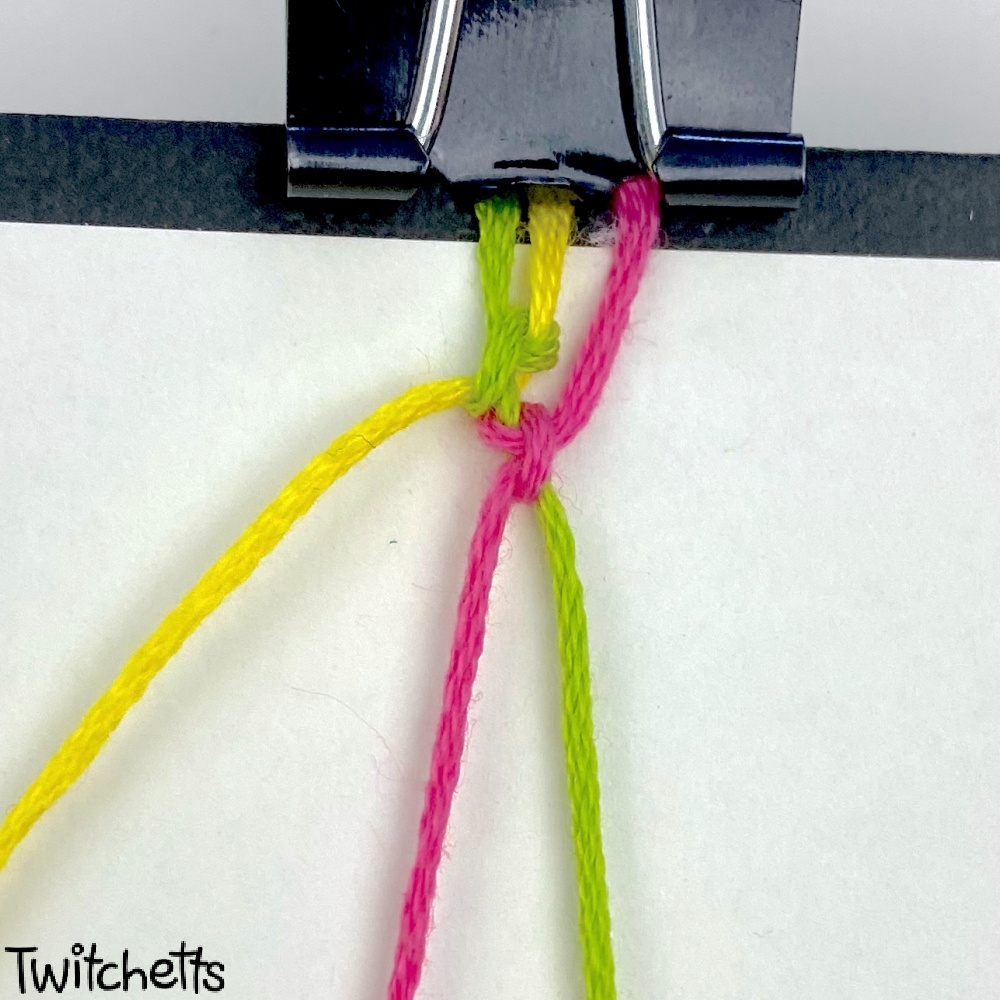
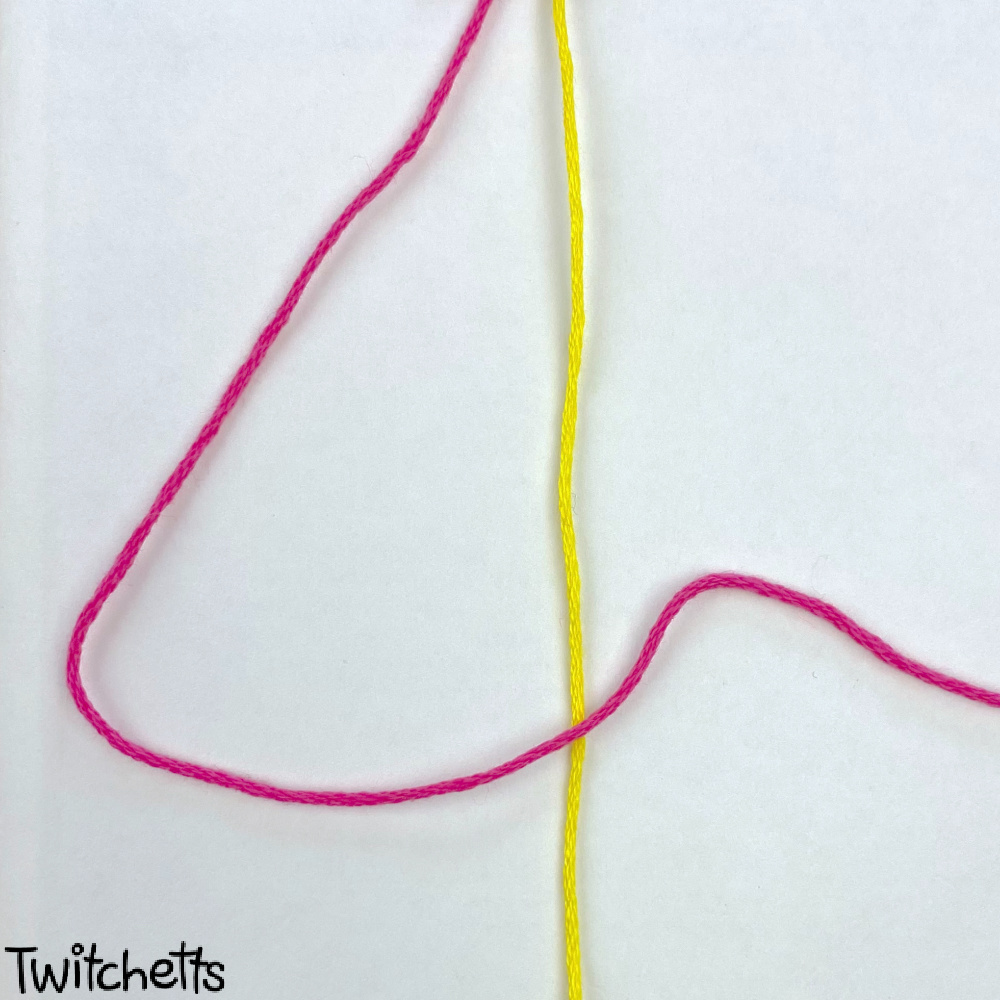
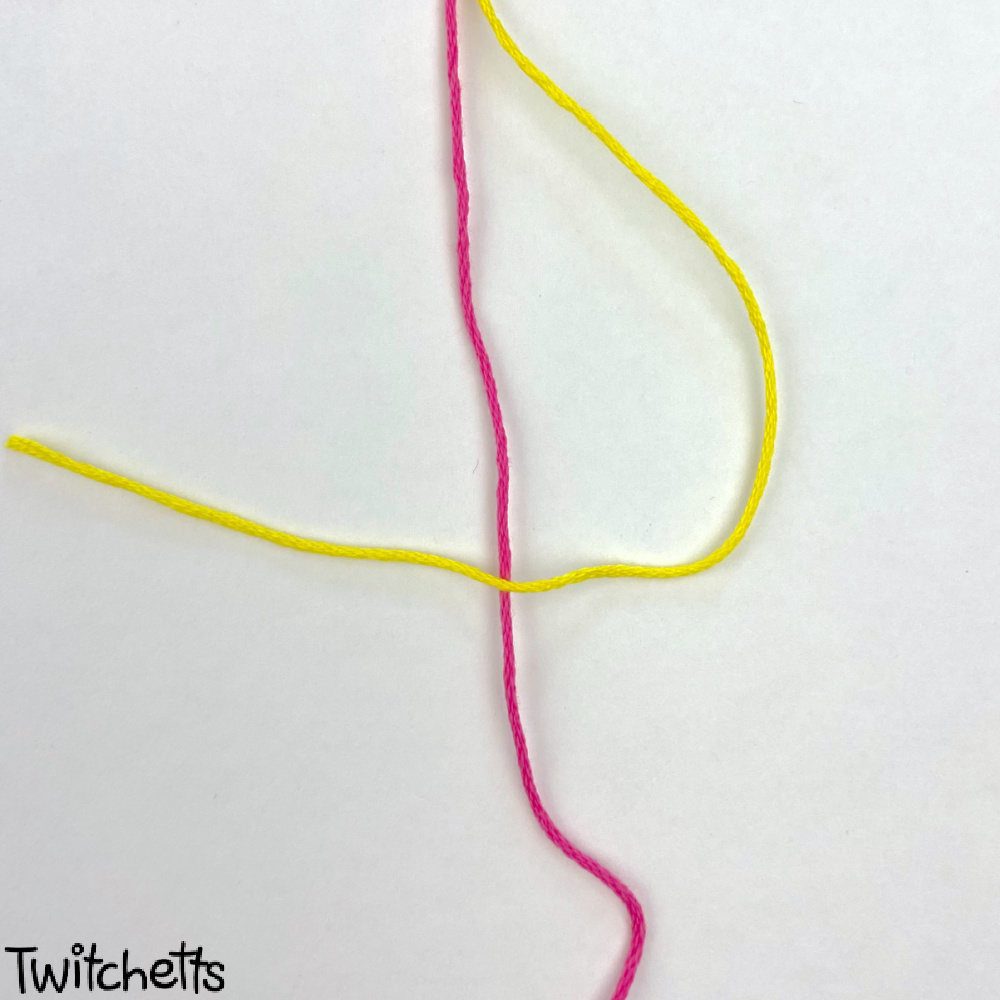
Backward Knot
To complete a backward knot you will be creating 2 reverse hitch knots.
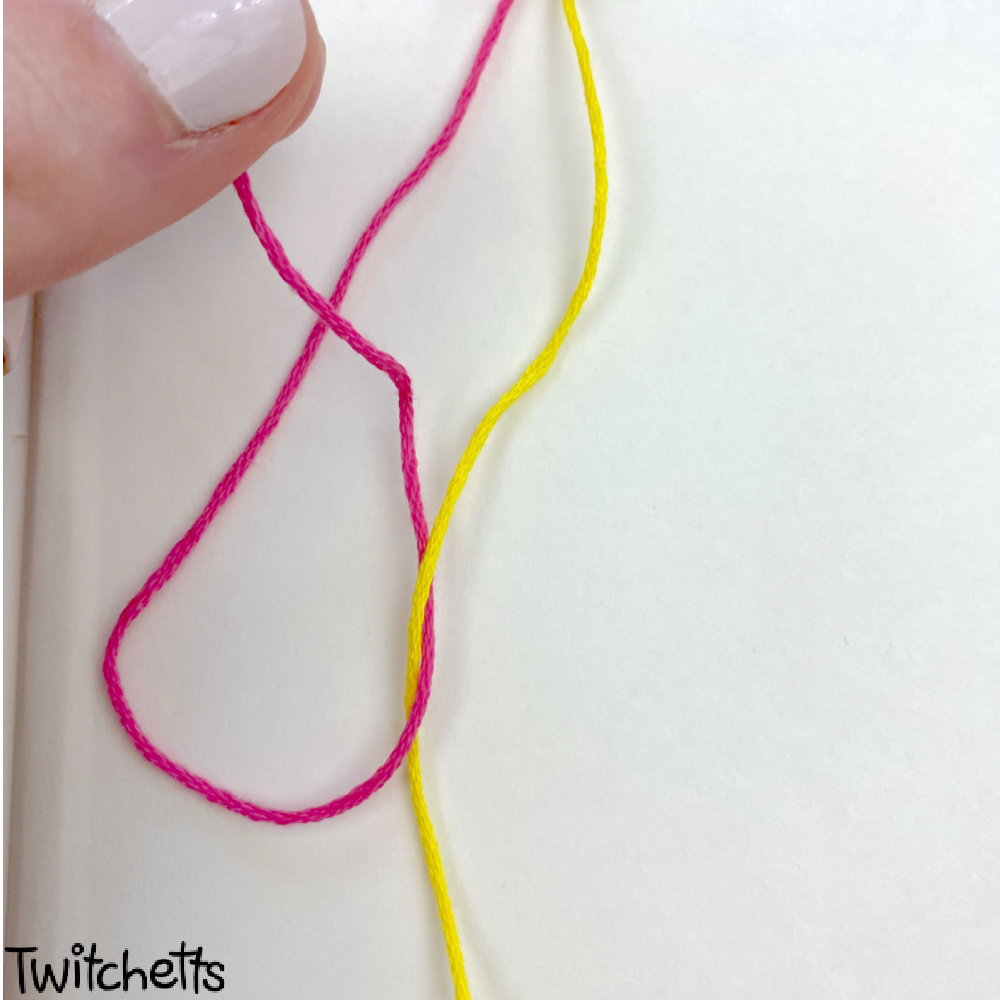
- Start your forward knot by creating a backward number 4 using the string on the right side. The top color wil befome the knot string. (pink in the image) The bottom, base string, will hold the knot and stay straight. (green in image)
- Bring your knot string (pink) under the base string (green) and up through the hole in your backward 4 shape.
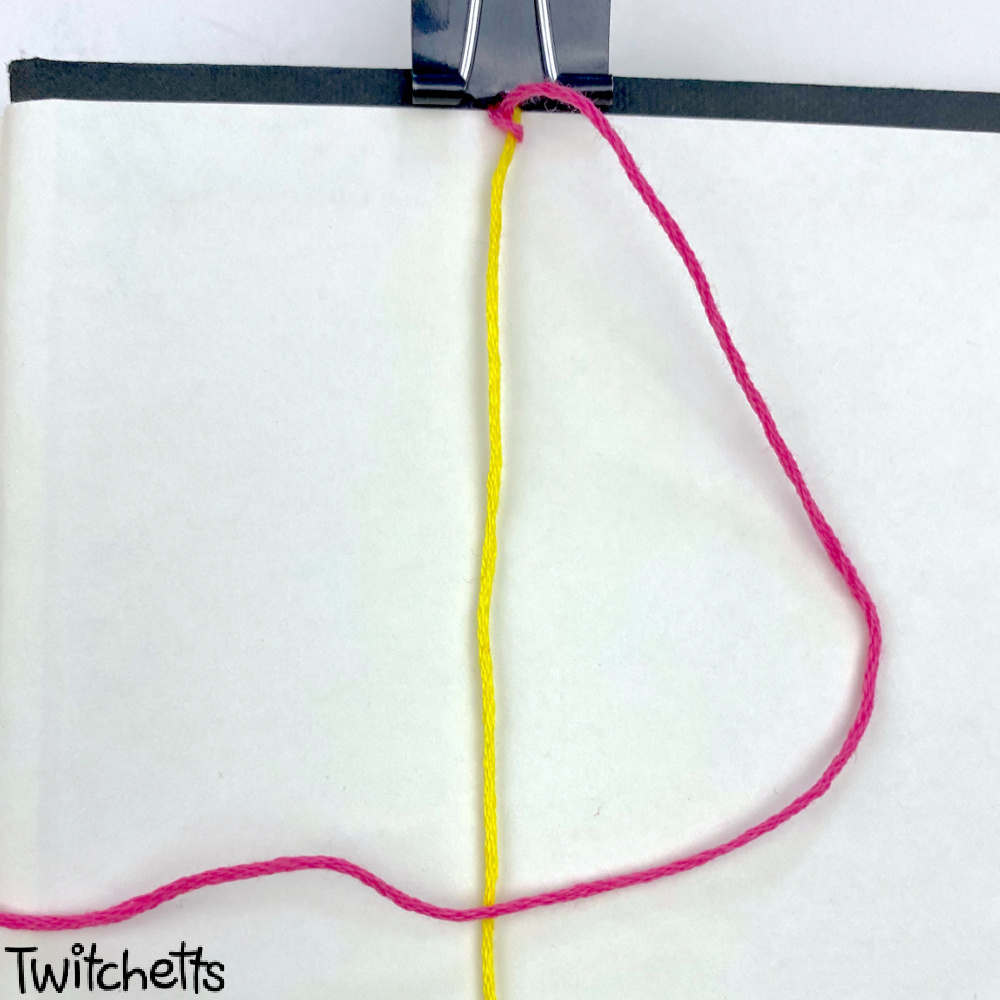
- Pull the knot string tight around the base string.

- While holding the base string tight slide, the knot string up to the top of your design.
- To complete a backward knot you will do this twice. So repeat steps 1-4.
- When you slide up your second knot the string will end on the left-hand side, moving the string backward!
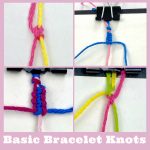
Forward Backward Knot
This knot is a combination of the first 2 knots you learned! It also takes 2 knots to complete.
- Start with creating a 4 shape. Knot string on top. (pink string in the photo)
- Wrap your knot string under the base string and up through the hole in the 4.
- Pull tight and slide up your base string.
- Next, make a backward 4 with your knot string.
- Bring the knot color under your base string and up through the hole in the backward 4.
- Pull the knot tight and slide up your design.
- Your forward backward knot will leave your string on the same side of your base string as it started.
Backward Forward Knot
This knot is similar to the one above. Just in reverse order. 2 knots are needed for this as well.
- Start with creating a backward 4 shape. Knot string on top. (yellow string the in photo)
- Wrap your knot string under the base string and up through the hole in the backward 4.
- Pull the knot tight and side it up the base string.
- Next, make a 4 shape with your knot string.
- Bring the knot string under the base string and up through the hole in the 4.
- Pull the knot tight and slide up your design. Your backward forward knot will leave your string on the right-hand side of your base string as it started.

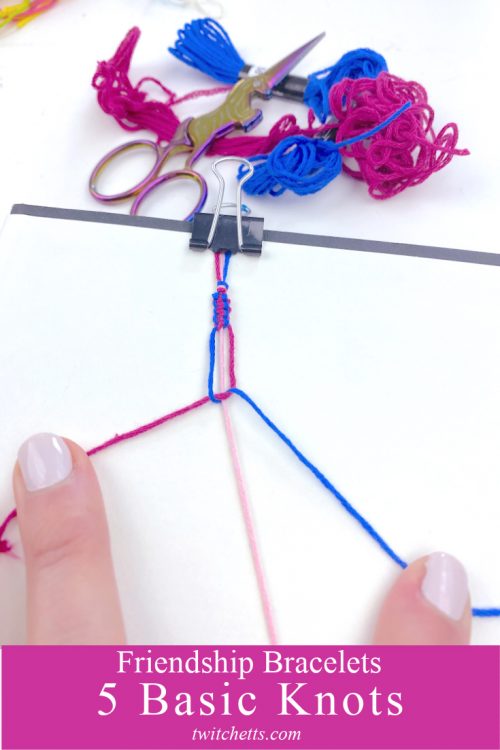
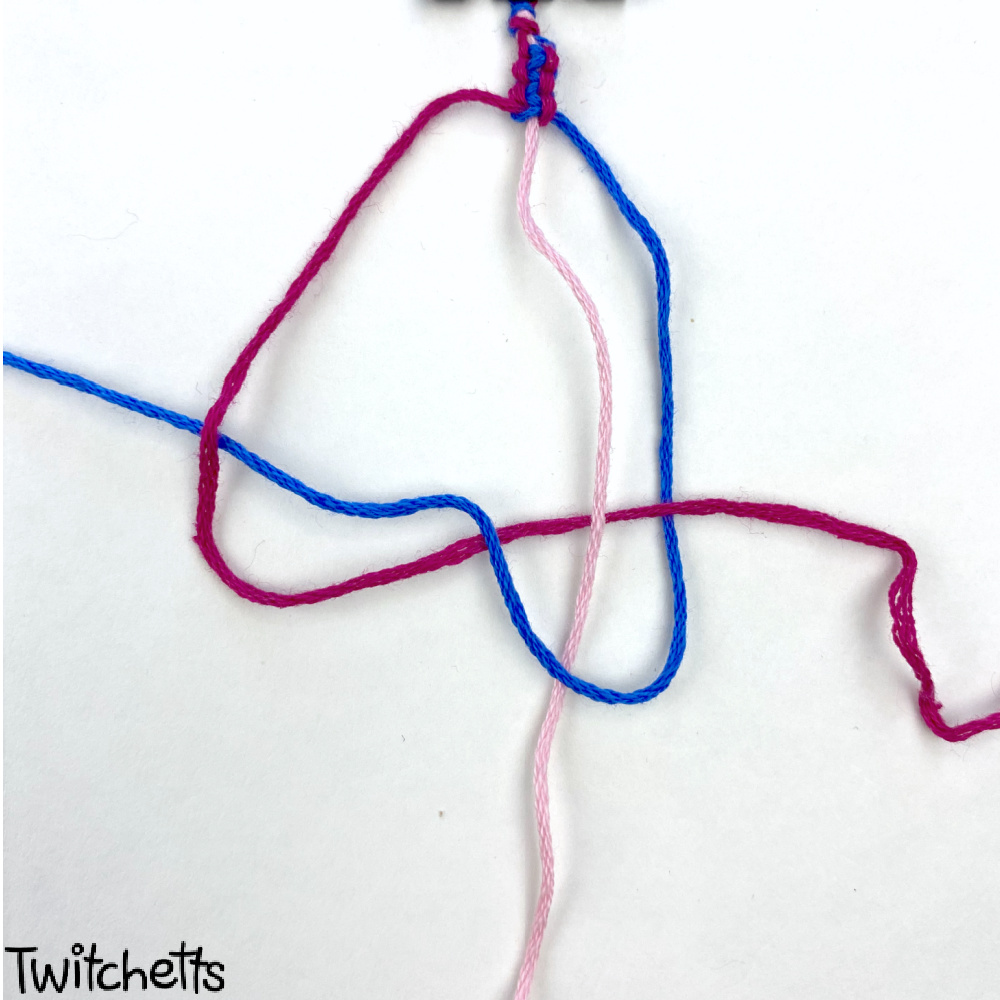
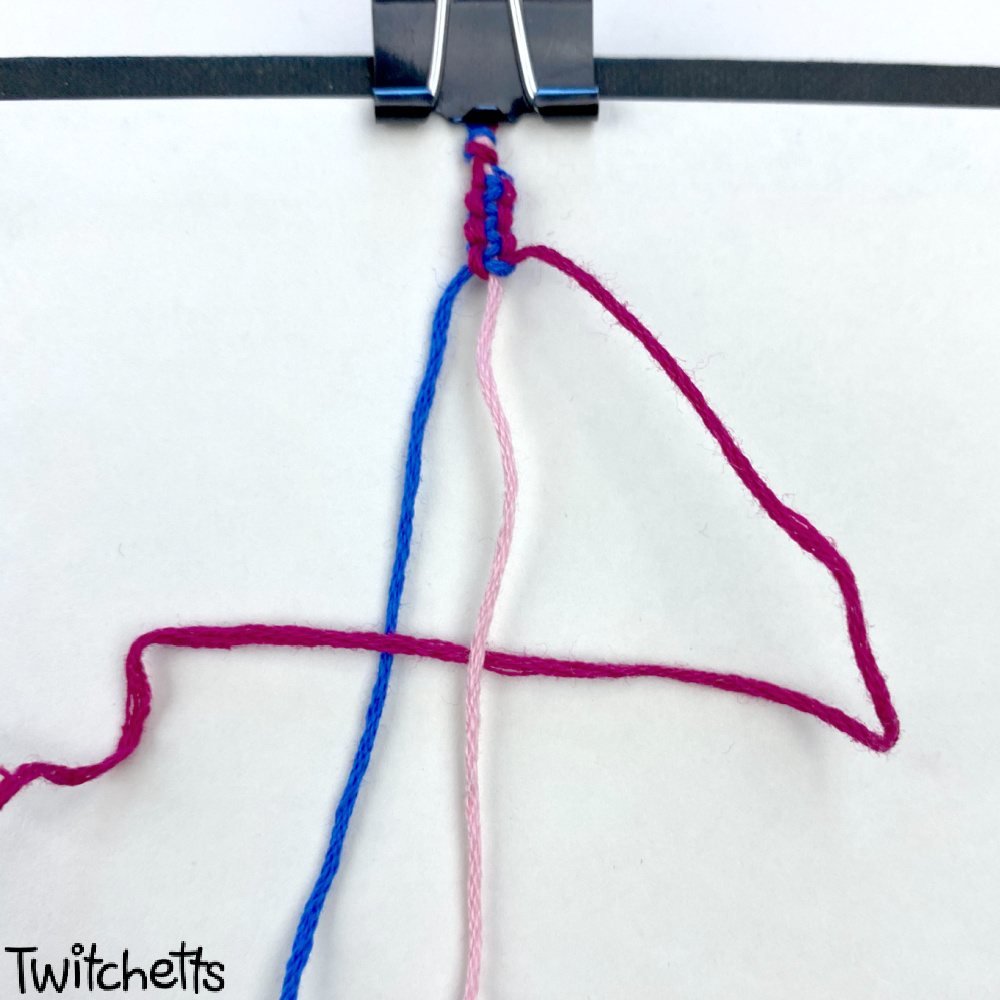
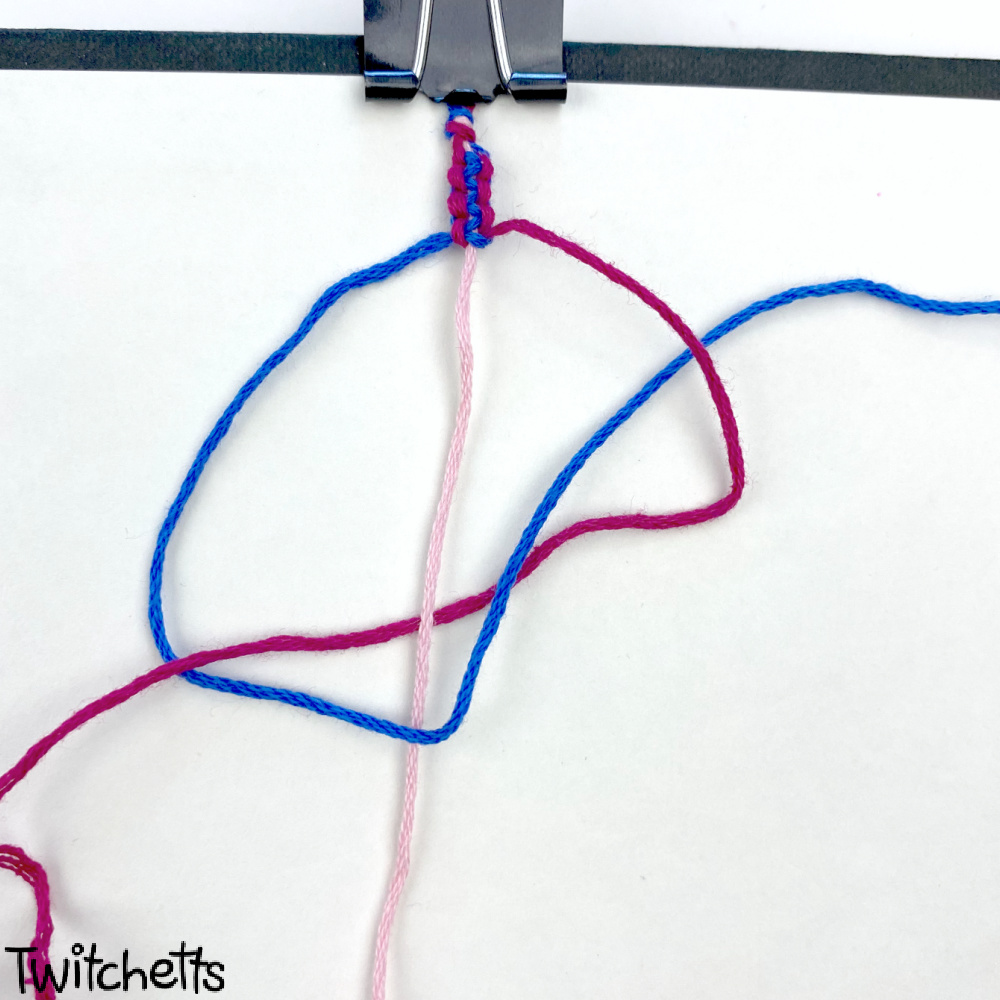
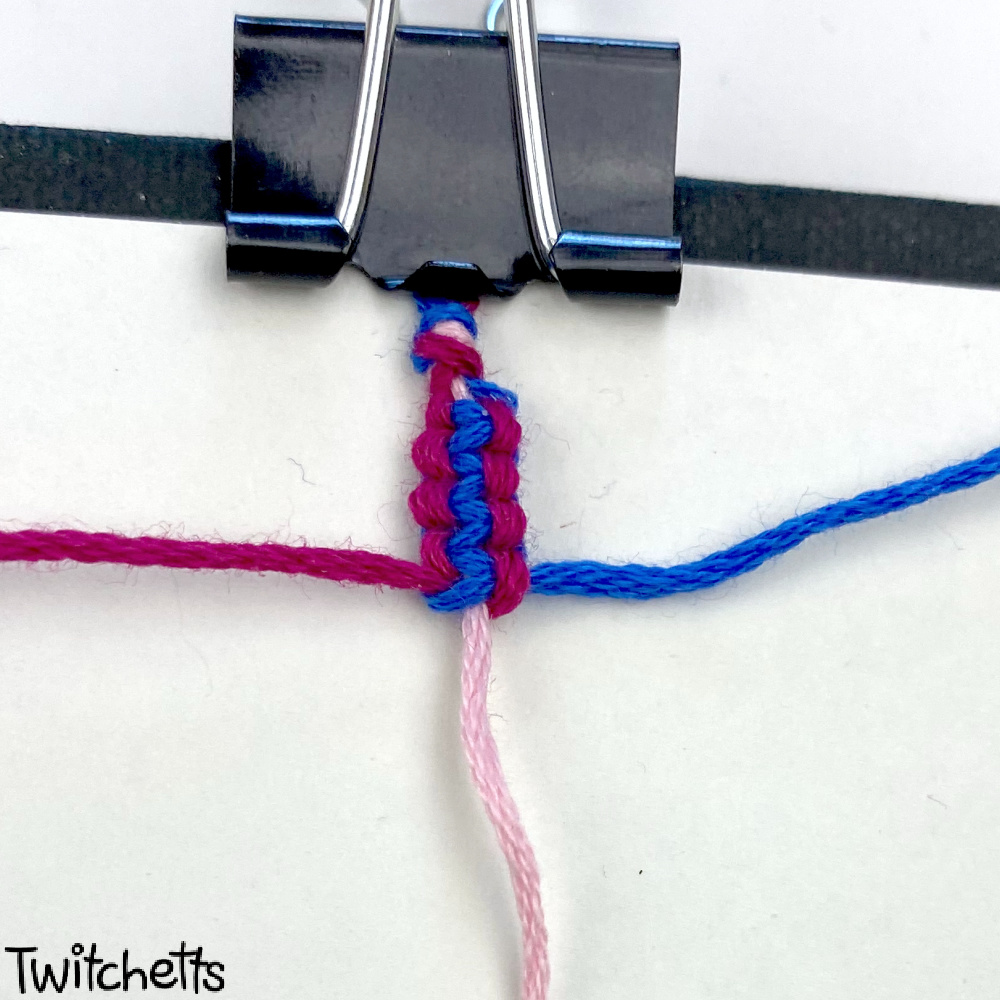
Square Knot
Just like all of the rest of our knots a square knot consists of 2 completed knots.
- Take the left string (dark pink) under the center string (light pink) and over the string on the right.(blue string)
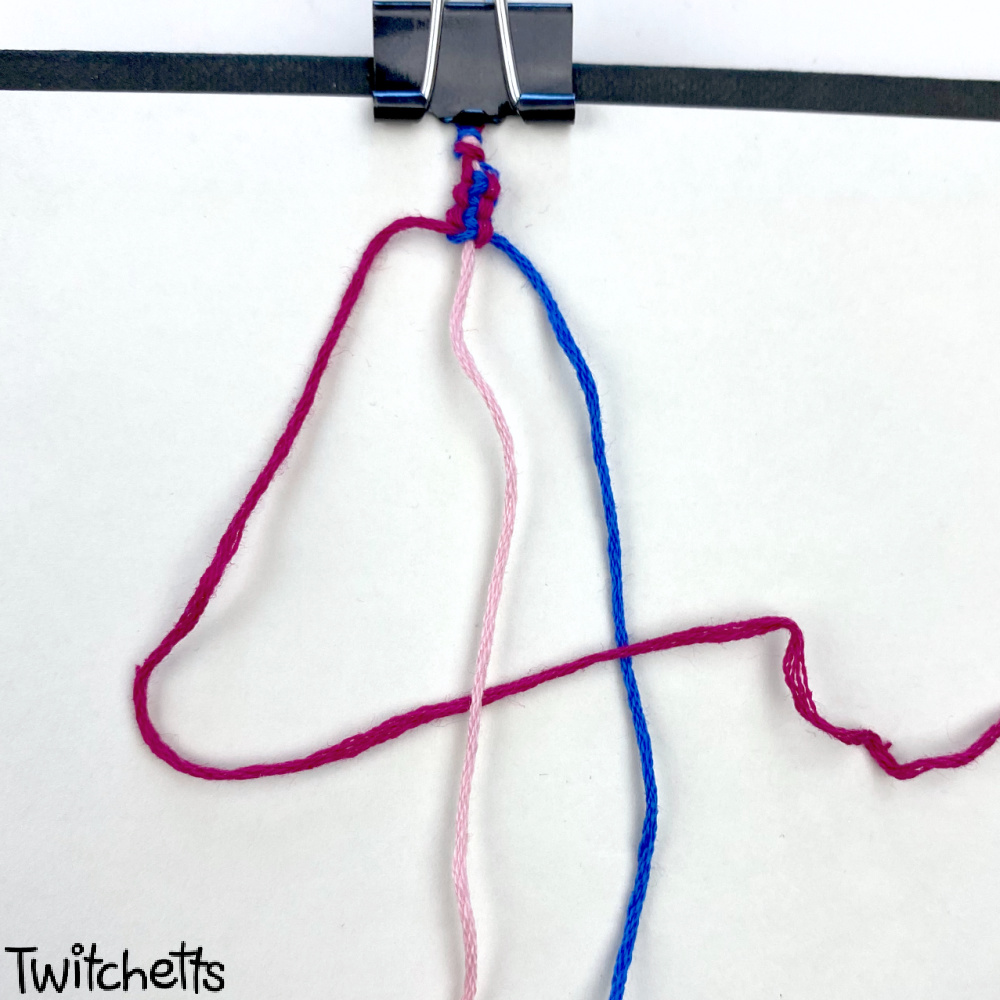
- Bring the string on the right (blue) up over the center string (light pink) and then under the left side string (dark pink).
- Pull the dark pink and blue strings at the same time to create the knot and slide the knot up the center string.

- Take the right string (dark pink) under the center string (light pink) and over the string on the right (blue).
- Bring the string on the left (blue) up and over the center string (light pink) and then under the right string (dark pink).
- Pull both sides (dark pink and blue) tight to complete the knot and slide it up the center string to complete your square knot.
Notes
When creating friendship bracelet knots you don't want them too tight. This does take some practice because too loose won't look great either.
More crafts for girls
- First Bracelet – If this pattern is a bit difficult, try this twisted bracelet instead.
- Candy Stripe Bracelet – A classic friendship bracelet pattern.
- Castle Crafts – If your girls love princesses, they’ll love these castles.
If you love easy friendship bracelet patterns, share them by pinning or sharing them on Facebook.
This site wouldn’t be here without shares from people like you, and we are so thankful that you took the time to visit Twitchetts.
Know a friend who is looking for friendship bracelet knots? Please share this tutorial on Facebook or save it to your favorite board on Pinterest.