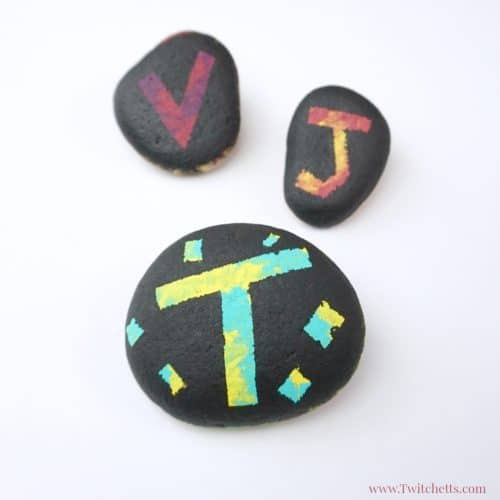
These silhouette painted rocks are perfect for kids! You can paint them in any shape, letter, or number! Your kids will love hiding (and finding) these. Check out these simple step by step instructions and video tutorial for this fun stone painting idea.
Silhouette Painted Rocks
When it comes to painting rocks with little ones, lot’s of kids end up blending the paints all together on top of the rock.
While these can look pretty, we wanted to find a fun way to take them up a notch. To create something they can personalize without too much extra effort!
These silhouette painted rocks are the perfect way for young kids to create fun and simple rocks that are more than just mixed paints.
Disclosure: Some of the links in this post are “affiliate links.” This means if you click on the link and purchase an item, we may receive an affiliate commission.
Supplies for the stone painting idea for kids
- A Rock.
- Acrylic Paints. Colors (that blend well) and black.
- Foam Brush.
- Square Edge Brush.
- Painters Tape.
- Scissors.
- Clear Sealant.
How to create this silhouette rock painting technique
These step by step instructions will help your little one create beautiful silhouette painted rocks. Then watch the video below to see it all in action!
Make sure to rinse your rock off and let it dry completely before getting started.
Next, pick out at least 2 colored paints to work with. Like we mentioned in our painting with toddlers post, colors that blend well work best. So stick to the same side of the color wheel so you don’t end up with brown.
Using the corner of your foam brush start dabbing color onto your rock. Flip your brush and use the other side for the second color!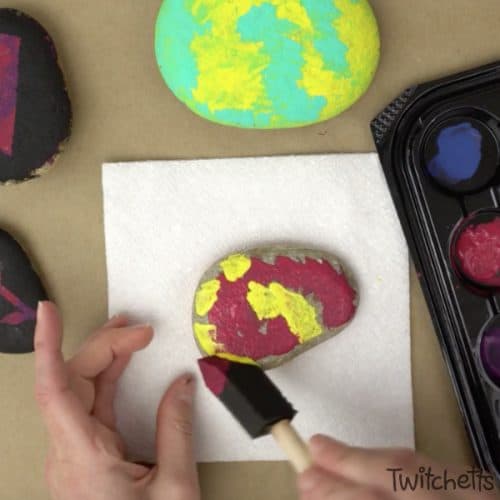
Once the rock is completely covered set it aside to dry. If you want to speed up this process you can use a blow dryer. 
When the rock is completely dry, start creating your design using painters tape. 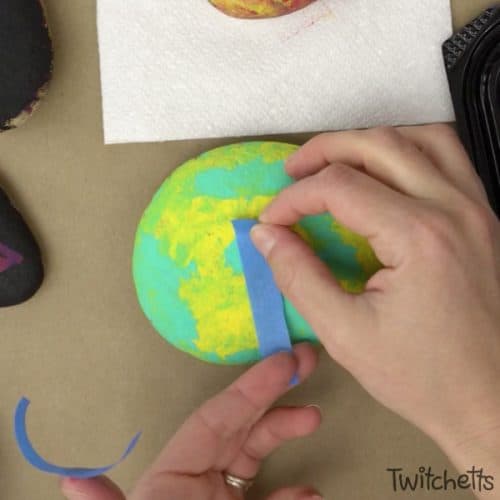
You may have to help your little one’s vision come alive here, depending on their age.
Keep in mind that the rock’s surface isn’t completely smooth so some paint might get under. A simple design works best.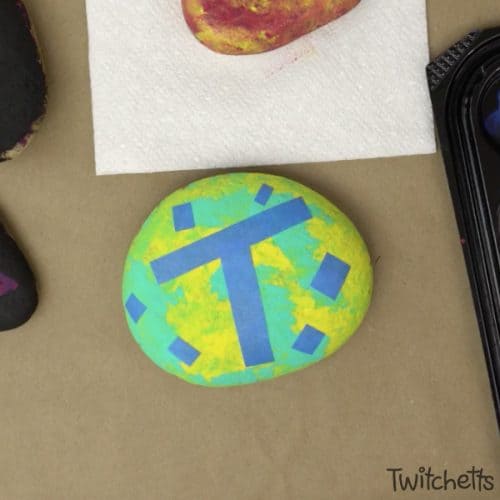
Press down on all the edges then start to paint over it black. Using your brush, start on the tape and brush off over the edge.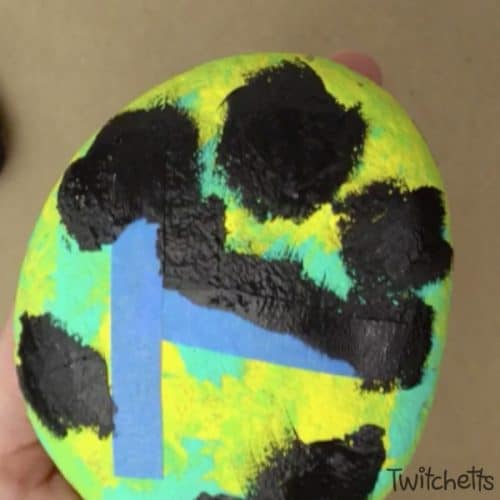
Work your way around your shapes, then paint the rest of the rock with the black paint. 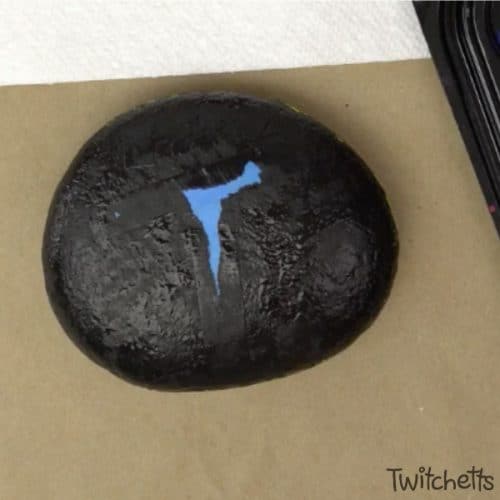
Let it sit again to dry. Then pull off the tape to see your creation! 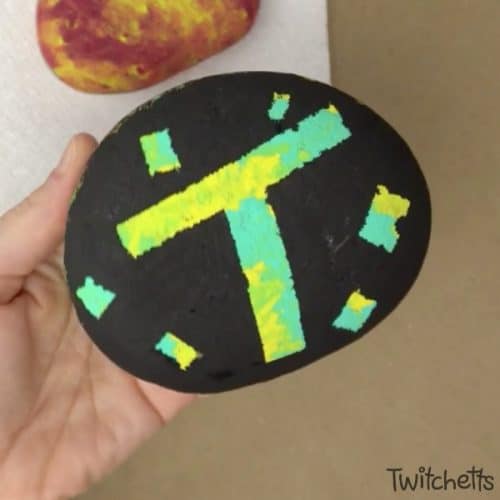
If you are planning to hide your rocks outside in the elements make sure to spray with a clear coat that is weather resistant!
There are so many ways you can create with this technique you will be amazed what your little ones will come up with!
Pin this to your favorite Pinterest board!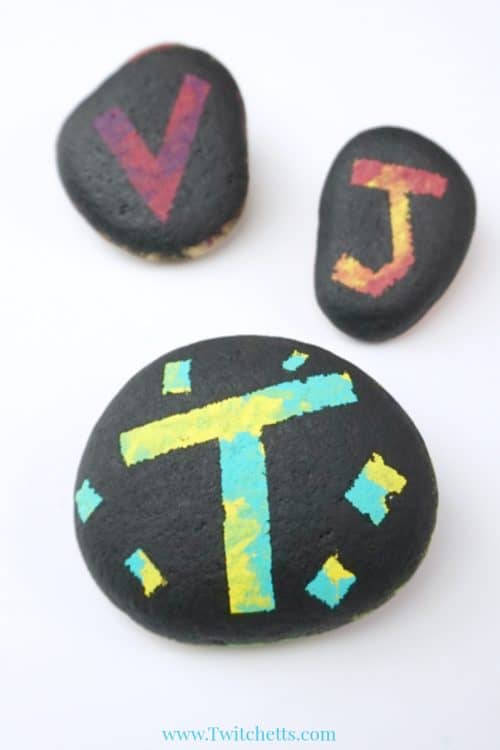
If you enjoyed this painted rock, you’ll love these:


How to use coffee filters to make amazing rocks - Twitchetts
Wednesday 25th of July 2018
[…] to dry overnight and then spray to seal. You could also add words or pictures on top of these, but I think they are pretty just the way they […]