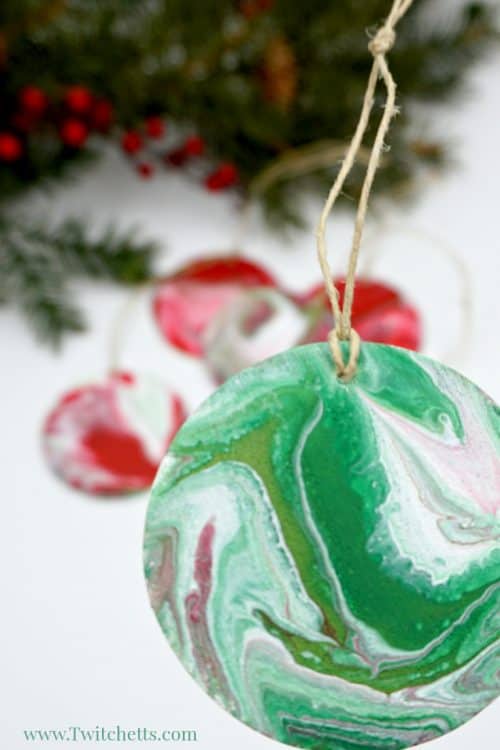
Your kids can create these amazing acrylic poured Christmas ornaments. Because pour painting is so unique, each ornament will be unique and amazing! We use a simple and inexpensive additive to the paint so that you use less and still get amazing results. 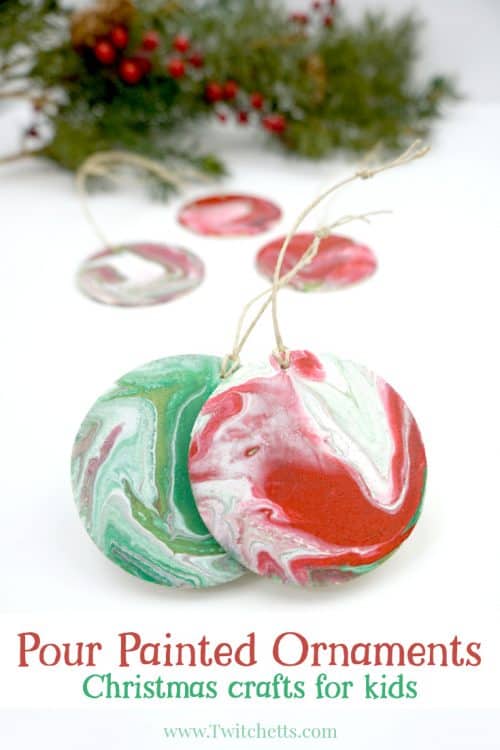
Acrylic Poured Christmas Ornaments
We are so excited to share this fun technique with you! This is just the first of many fun pour painting for kids projects, also known as fluid painting, we will be creating.
Our technique keeps kids in mind. We use a simple and inexpensive additive to the paint so that you use less and still get amazing results.
It’s messy, but fun and kids will love this fun process art technique.
Disclosure: Some of the links in this post are “affiliate links.” This means if you click on the link and purchase an item, we may receive an affiliate commission. 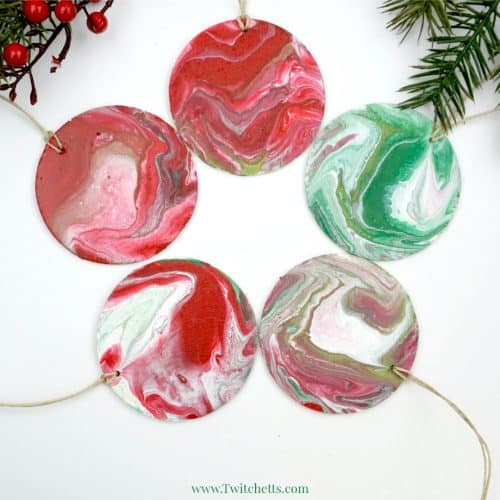
Supplies for fluid painting:
- Acrylic Paints.
- White Glue.
- Water.
- Craft Sticks.
- Measuring Spoon.
- Wooden Ornaments.
- Drying Rack.
- Canvas. Optional, but a great way to use up your extra paint!
- Hemp. Or any kind of string.
- Small Cup for Pouring.
- Toothpicks.
How to create marble painting Christmas ornaments
Check out the step by step instructions for these poured Christmas ornaments and then watch it all in action in the video below.
Start by prepping your paint. The key to keeping the colors from all blending together is having a thickening agent.
They sell some of these at the store, but we have created one that will save you some money, and maybe a trip to the store.
Just mix 2 parts white glue with 1 part water. Then prepare your paints by mixing 1 part of your thickening agent to 1 part paint. 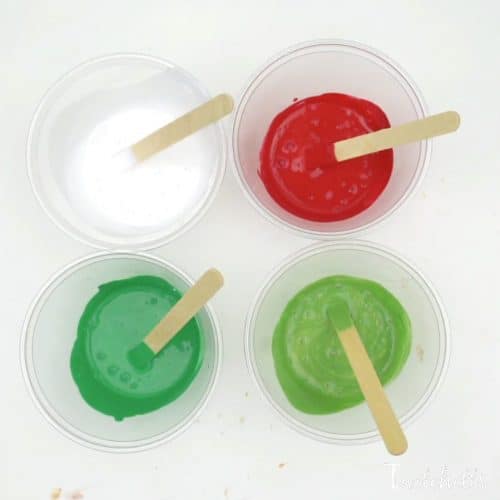
We created 6 ornaments and an 8×8 canvas all from 4T of paint.
Once your paints are mixed it’s time to stack them in your small cup (a medicine cup works great!). 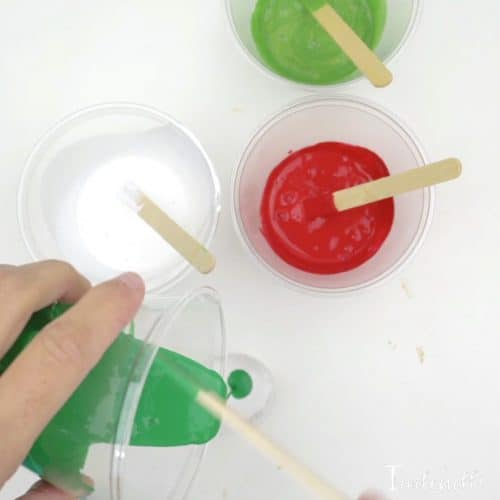
Just go back and forth between paint colors. 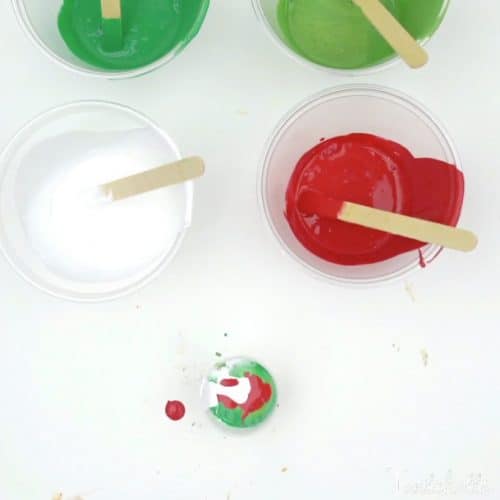
Related Project: This technique looks amazing on rocks!
Lay your ornaments on a drying rack, if you’re creating a canvas, slide it underneath to catch the paint. 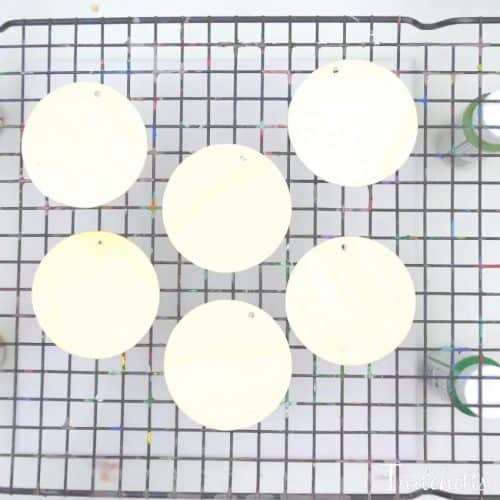
Now pour the paint onto the ornaments! 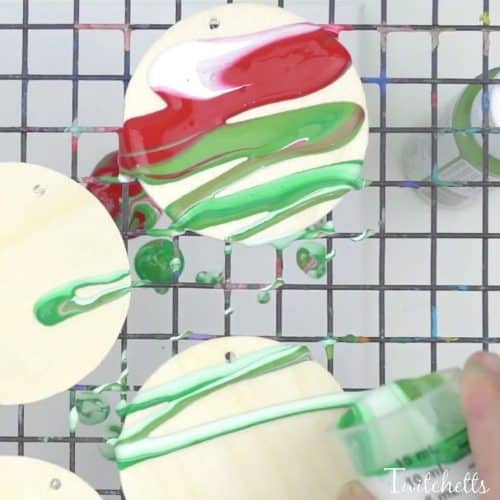
When you have a good amount of paint on each ornament you can tilt the whole rack to spread the paint around until the whole ornament is covered. 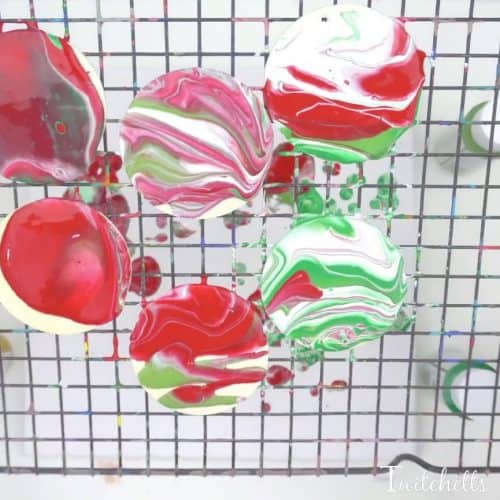
Use the remaining paint on the canvas. 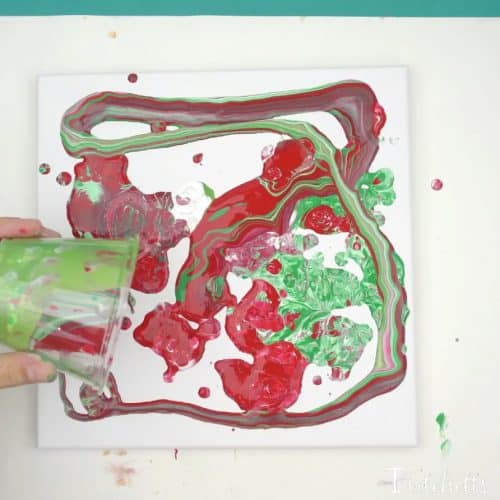
Tilt each direction until it is covered.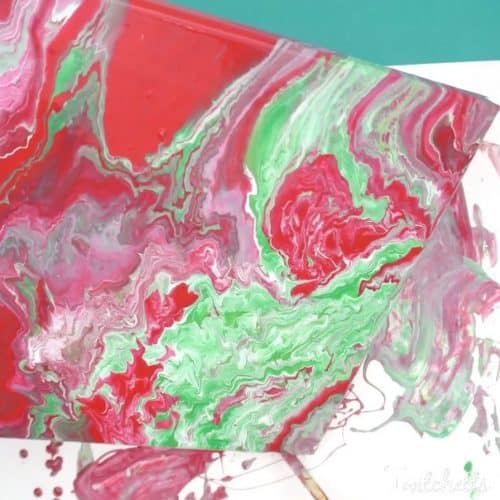
Insert a toothpick into the hole of each ornament while they dry.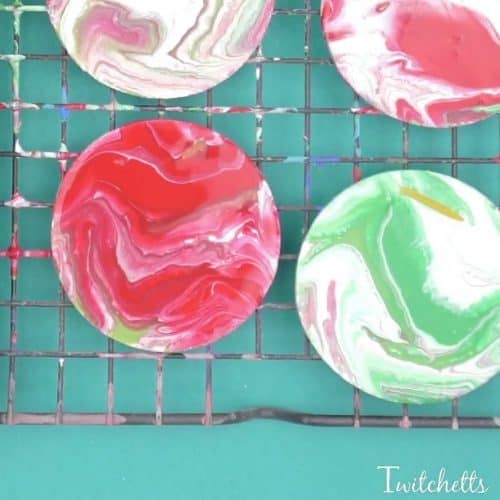
Related Crafts: Don’t miss any of these fun ornaments that kids can make!
Tip: Use a craft stick to move the poured Christmas ornaments around a bit so they don’t get stuck to the rack.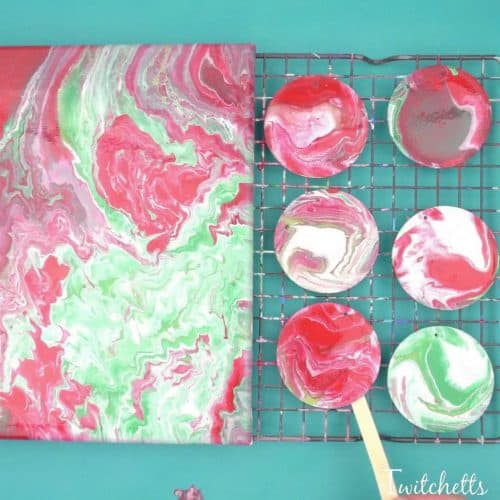
Once the marbled ornaments are dry, remove the toothpicks and add string. 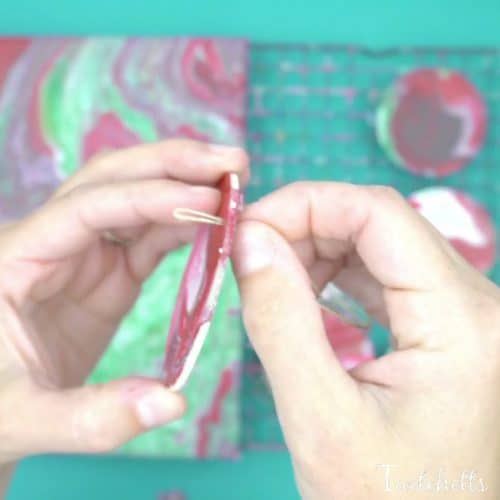
These poured Christmas ornaments will make excellent gifts that your little ones will be proud to hand out!
Clip On Christmas Decorations | Decoration Ideas Gallery
Wednesday 9th of September 2020
[…] Download Image More @ twitchetts.com […]
13 simple Christmas tree crafts for kids - Twitchetts
Tuesday 19th of November 2019
[…] Poured Christmas Ornaments – These DIY ornaments bring on the WOW factor. Plus, no two will be alike! […]
Poured Christmas Rocks ~ Pour Painting for Kids - Twitchetts
Monday 18th of December 2017
[…] Related Content: Pour Painted Christmas Ornaments […]
Baby-Safe Christmas Ornaments to Help Mom Keep Her Sanity - Mommy's Bundle
Thursday 14th of December 2017
[…] Pour Christmas Ornaments – Create another unique design with paint on simple wooden ornaments. […]
20 creative Christmas ornaments
Thursday 14th of December 2017
[…] Poured Christmas ornaments from Twitchetts […]